Hi, Guys,
Today I would like to share the Change Tracking feature of Dynamics 365 CRM.
Why enable Change Tracking?
Change Tracking enables incremental export, only records that have changed are exported.
In addition, you can export or retrieve a selected set of data, and then keep the external data warehouse in sync.
Suppose we have a lot of integrations of D365 CRM with other external systems. We need to keep track of changes done after the last synchronization of data and integrate only those changes to the downstream systems. For this scenario, Change Tracking is the best solution.
How to enable Change Tracking?
You can enable Change tracking for both system and custom tables(entities).
Once you enable the Track Changes you cannot disable it.
Using New UI Power Apps Settings
1, Expand Advanced Options.
For the Create scenario, On the New table page.
For the Update scenario, select a table, and then in Table Properties select Properties. In the Edit table page, expand Advanced Options.
2, In the For this table section, enable the Track Changes checkbox.
![]()
3, Save and Publish.
Using legacy settings
1, Navigate to Customizations-> Customize the System.
2, Select an entity, and under Data Services, select the Change Tracking checkbox.
![]()
How to custom query for Change Tracking
In this section, I will show you how to query the Chang Tracing data in the different scenarios and show the response data structure.
First of all, let's take a look at RetrieveEntityChangesRequest and RetrieveEntityChangesResponse classes.
RetrieveEntityChangesRequest
Input parameters
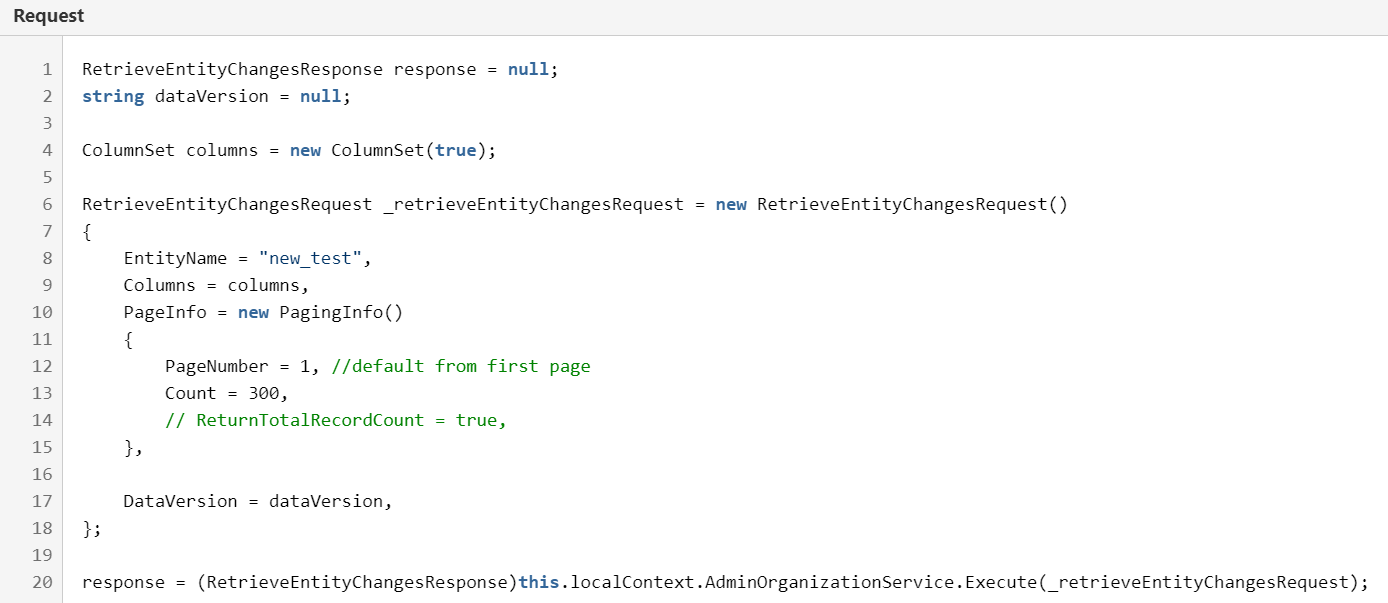
DataVersion is very import to only retrieve the changed data.
Set it as empty for the first time query, then return all records.
![]()
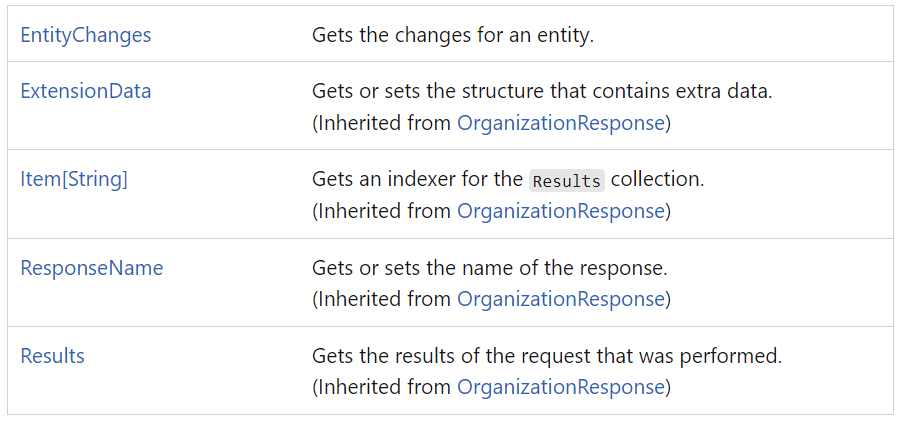
RetrieveEntityChangesResponse
Prerequisite
An entity enabled the Change Tracking feature.
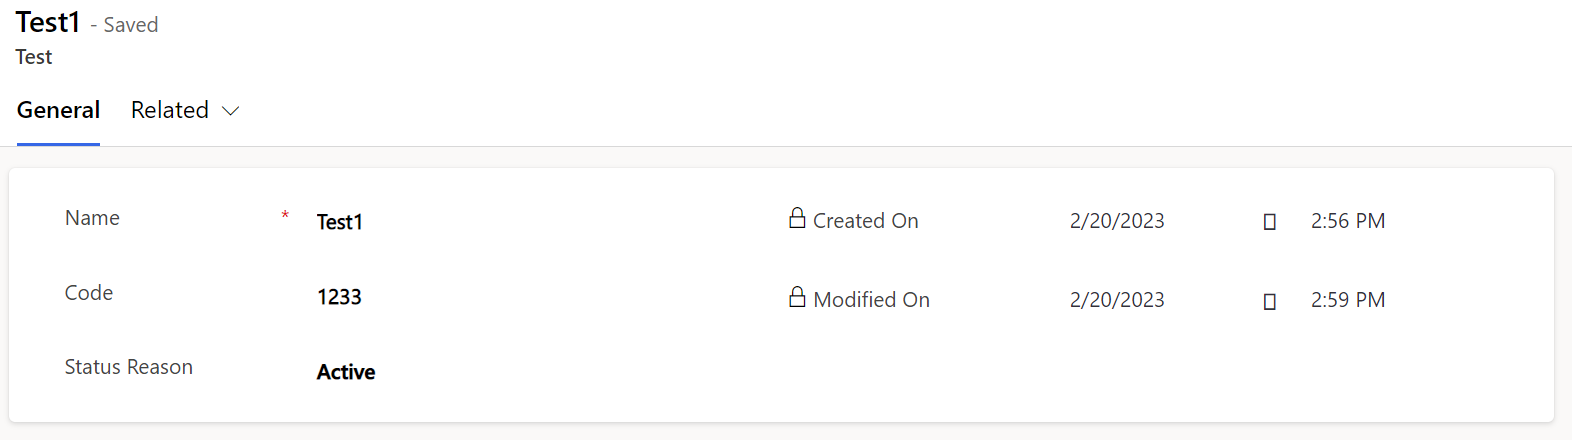
Create Scenario:
1, Create a new record named Test1
2, Execute below C# code to query the change data.
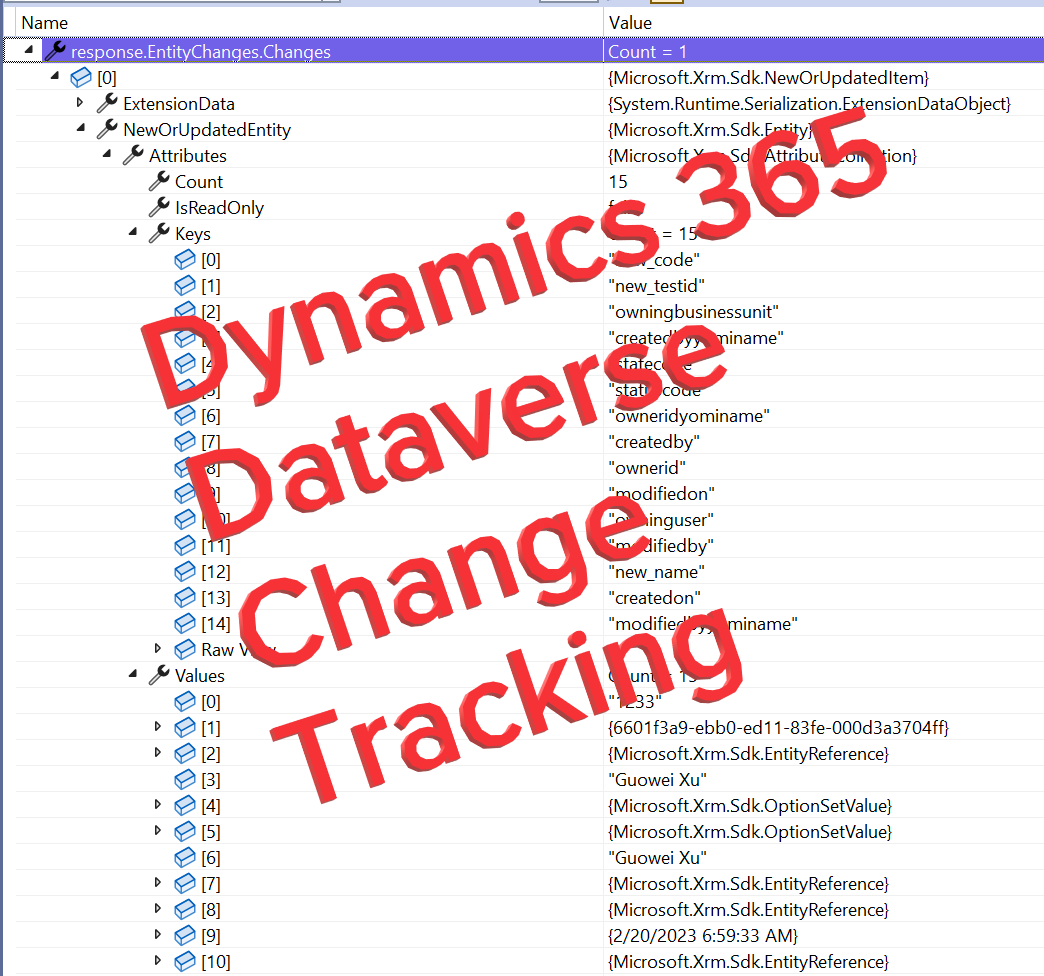
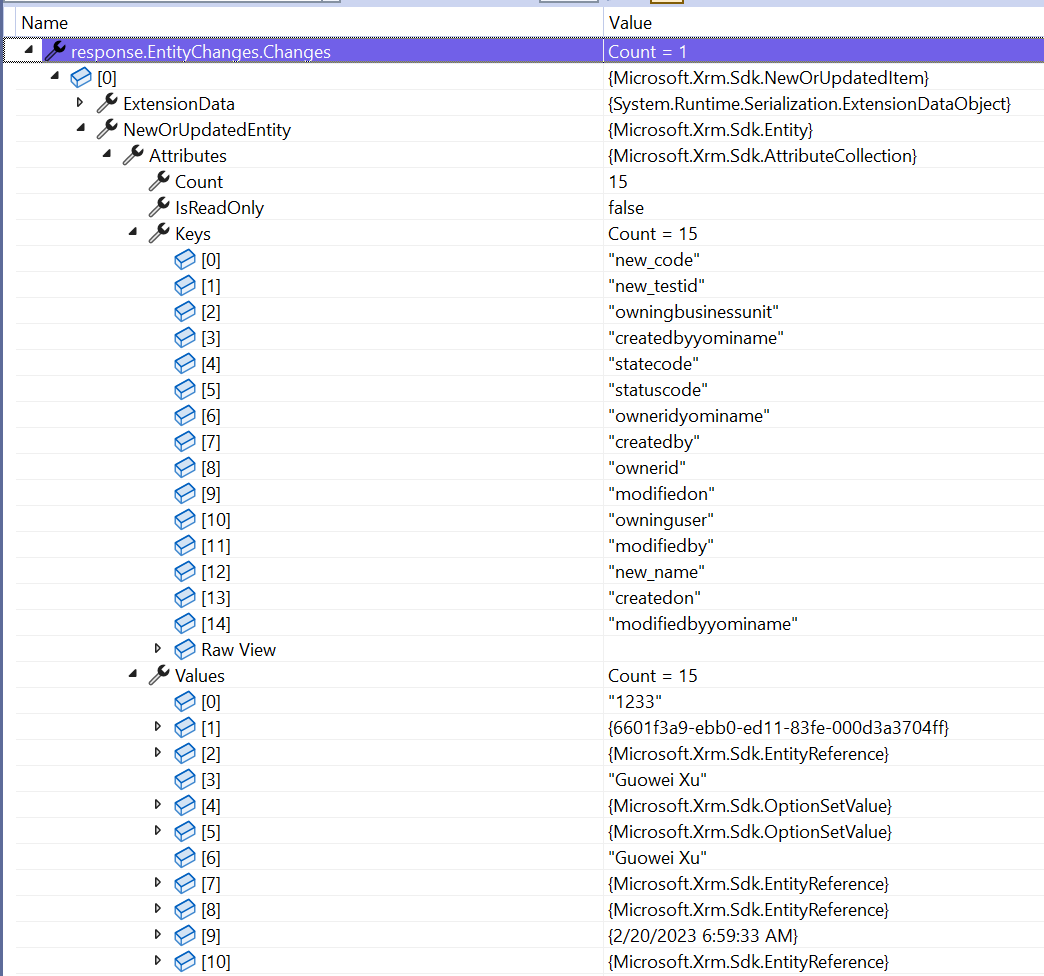
We got 1 record as a NeworUpdatedEntity Item.
The message also returns a DataToken that we can use in the RetrieveEntityChangesRequest, so that when we execute this request the next time, it returns data for those changes that occurred since the last execution of the request.
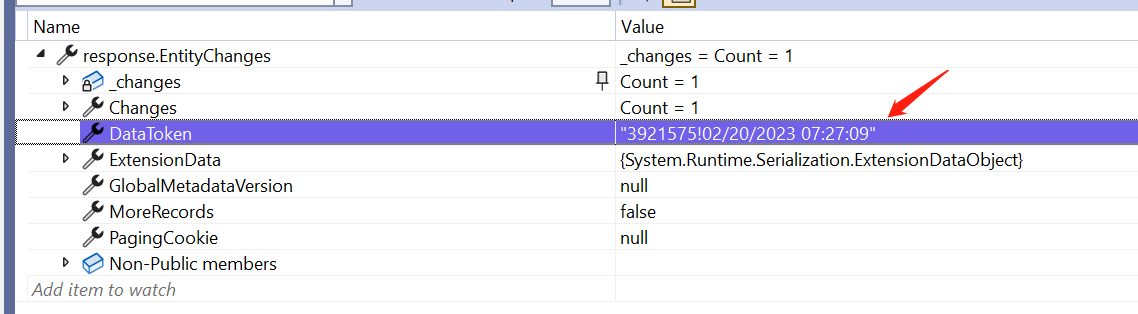
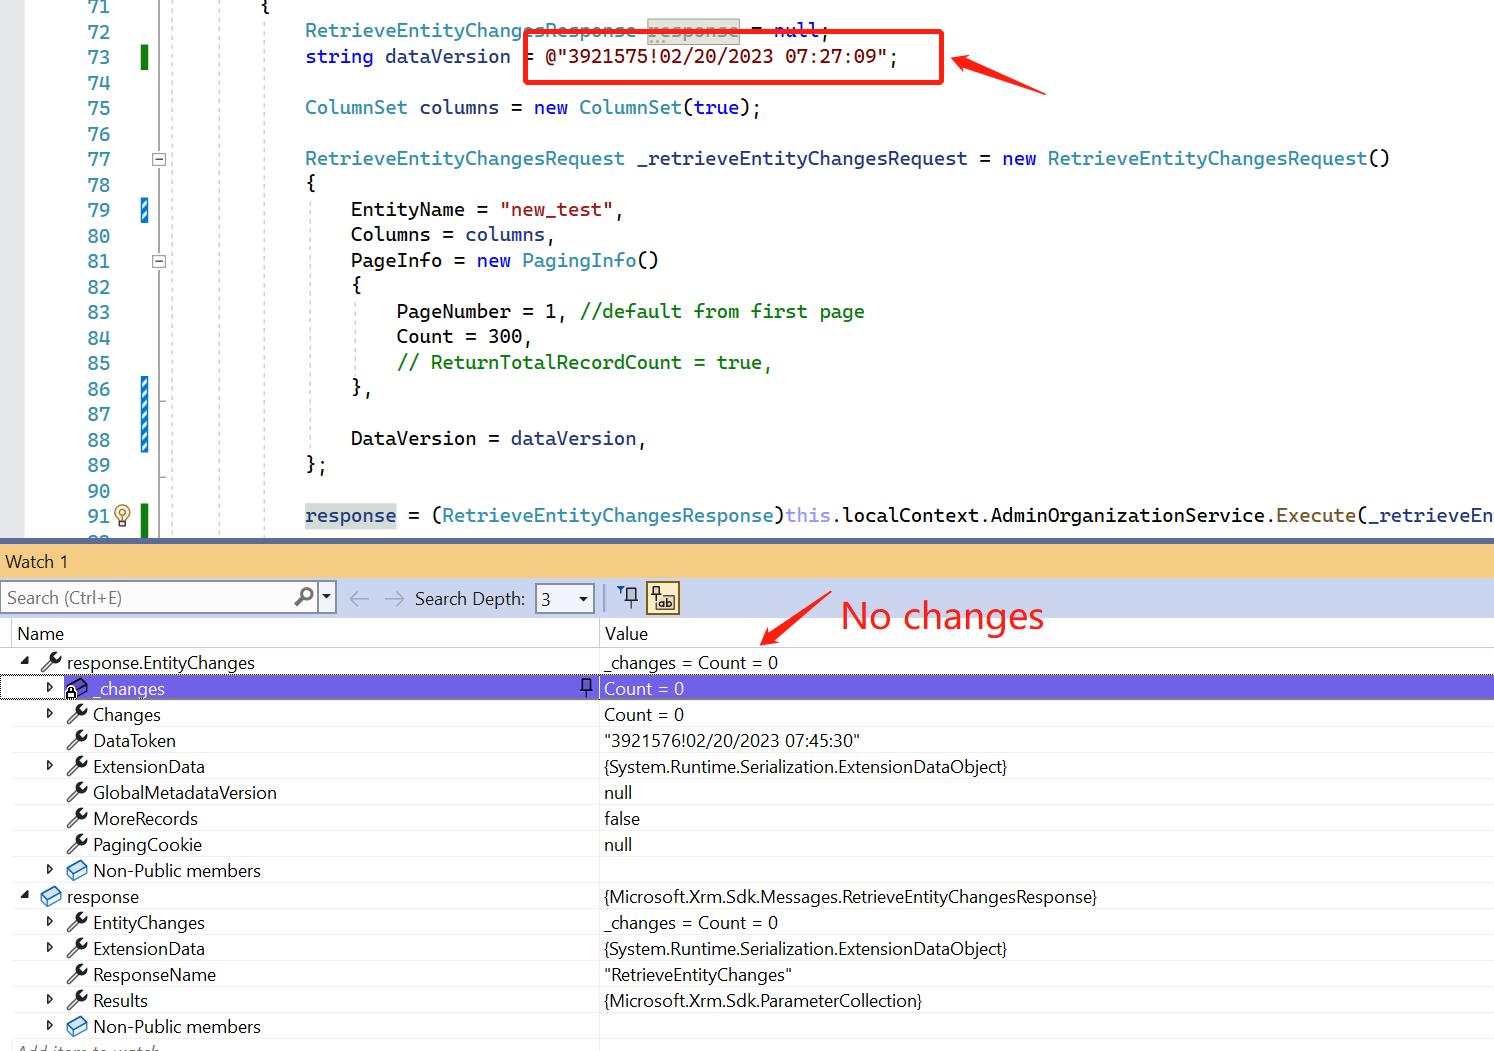
If retrieve again with the DataToken value, then no records were retrieved.
Update Scenario:
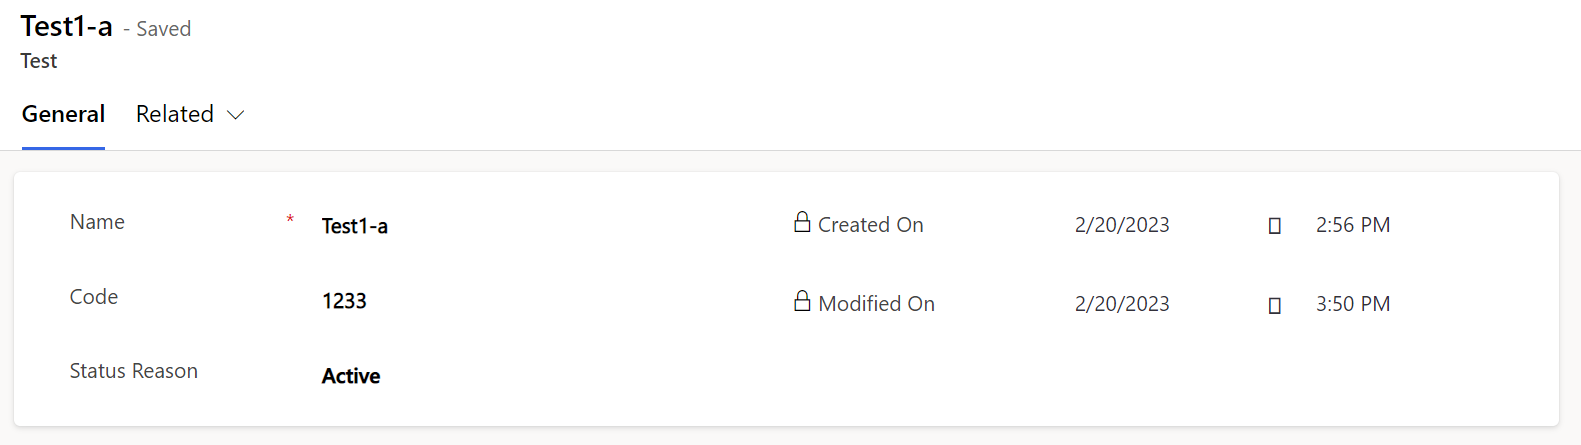
update the Name to Test1-a.
then execute the query with the previous DataVersion.
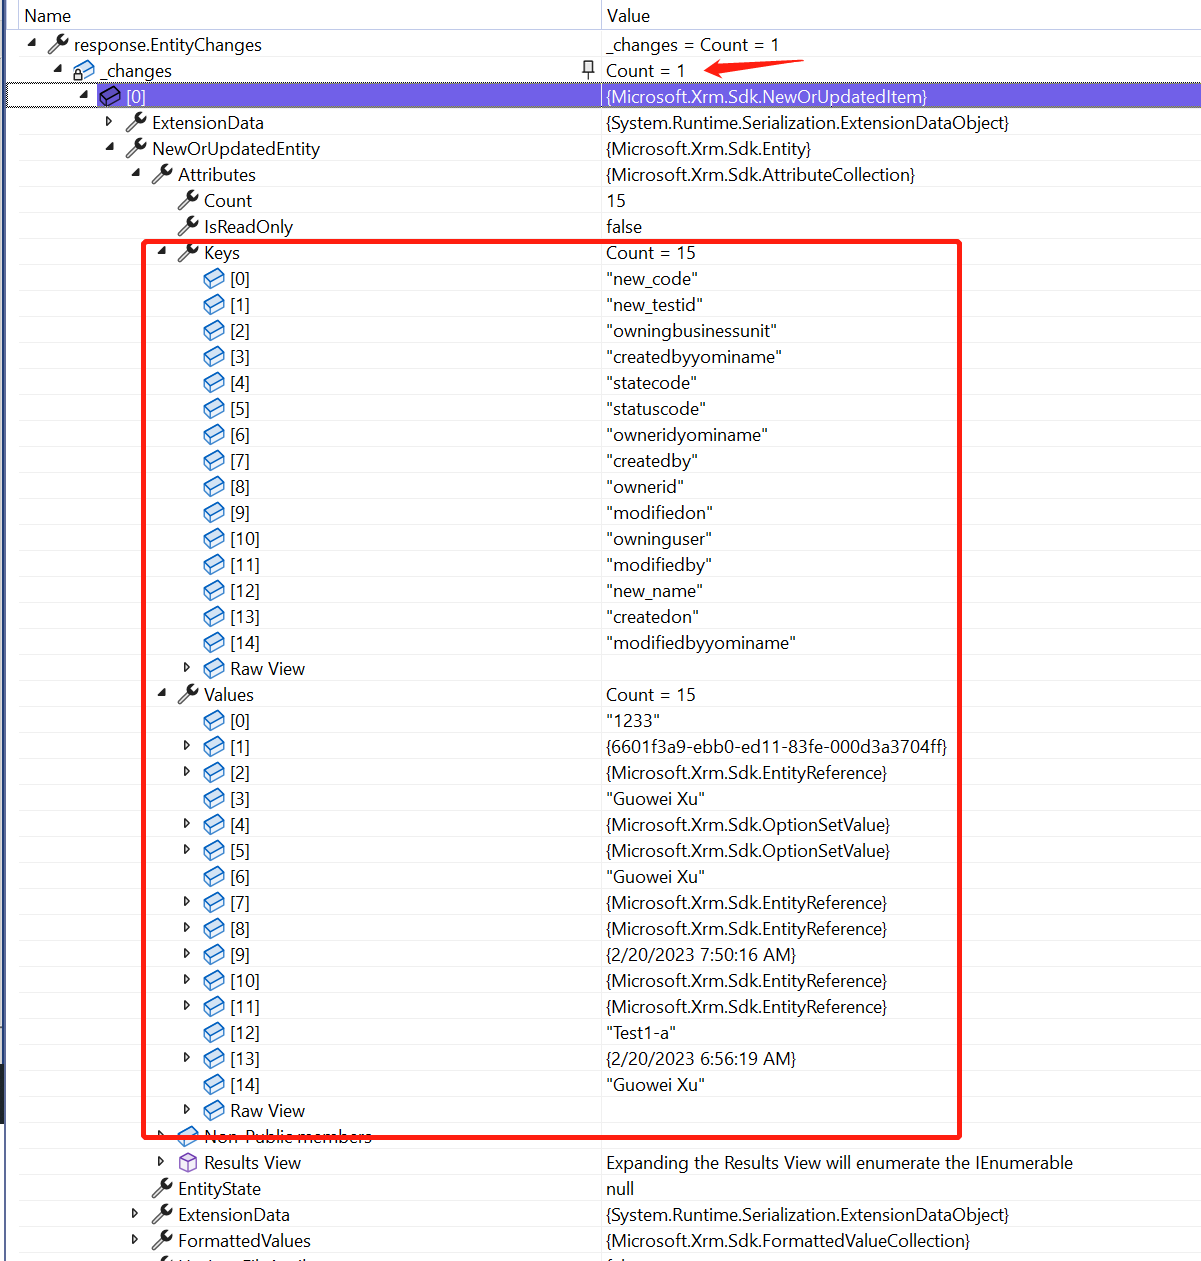
Only 1 record was retrieved, and all the columns responded as the result.
Delete Scenario
Delete the previous record Test1-a and create a new record Test2.
Execute the query code with the previous DataVersion
2 items were retrieved, 1 is NewOrUpdatedEntity, and 1 for RemovedItem.

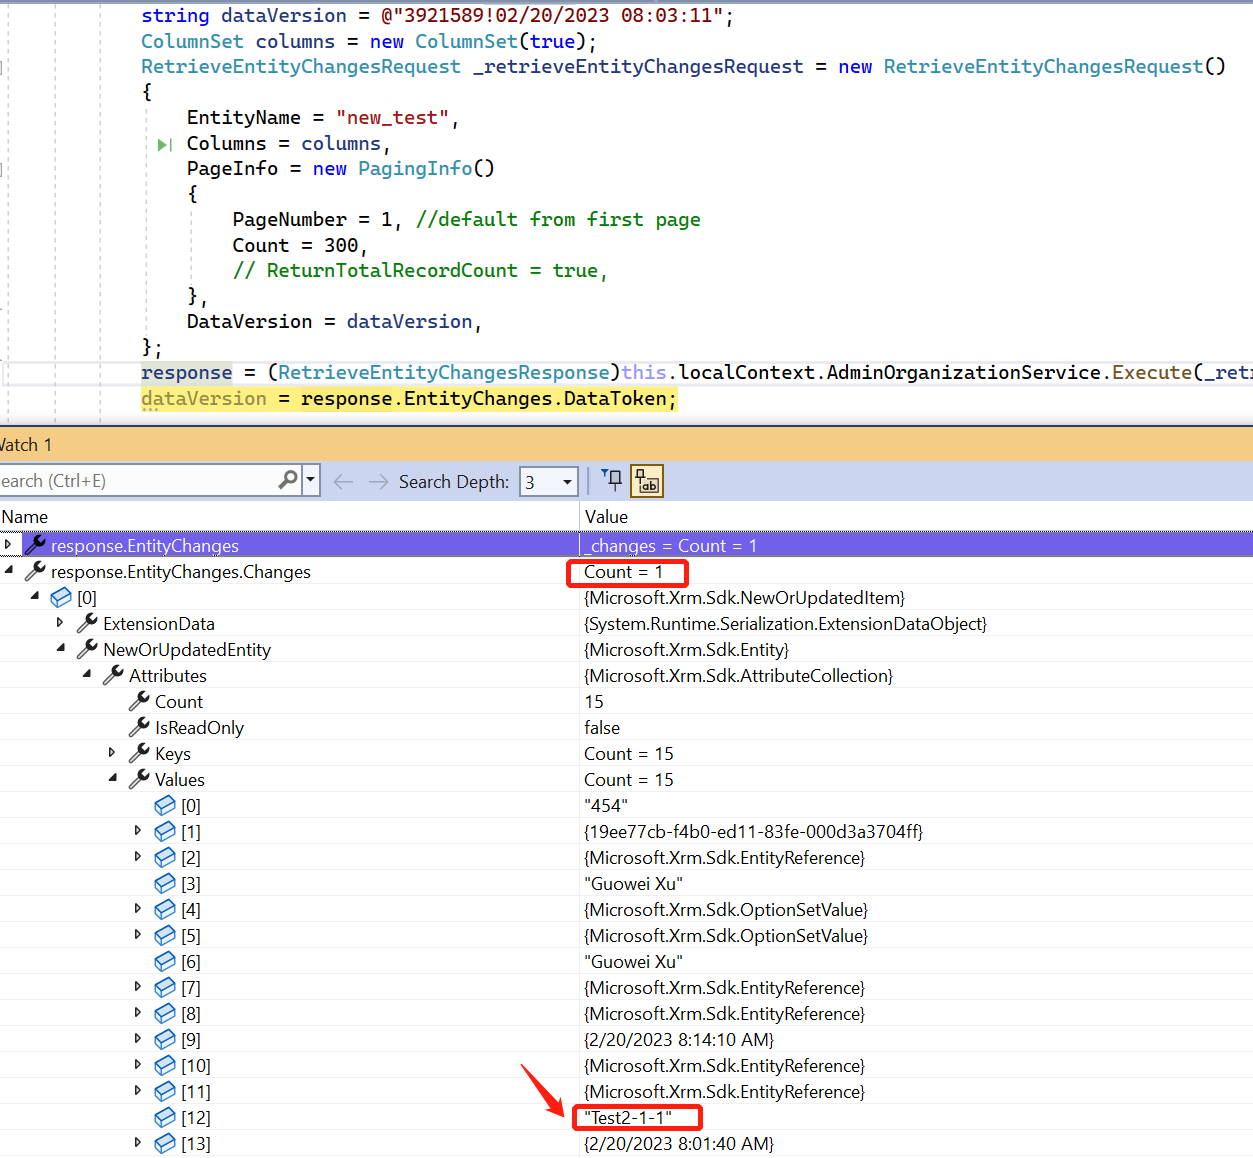
Multiple updates within the same record.
If we change the Name field from Test2 to Test2-1, then update to Test2-1-1.
The last change was responded to as the result.
END
Hope this will help.
Thanks for reading.