Friday, 27 June 2025

Filtered View in Dynamcis crm

 Dynamics CRM provides filtered views so we can access CRM data in SQL.

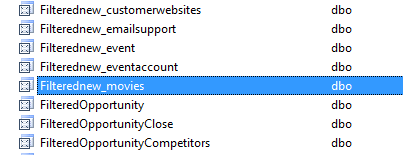
To access filtered views, go to the Dynamics CRM company database and go to Views. You will see views starting with the name “Filtered”:


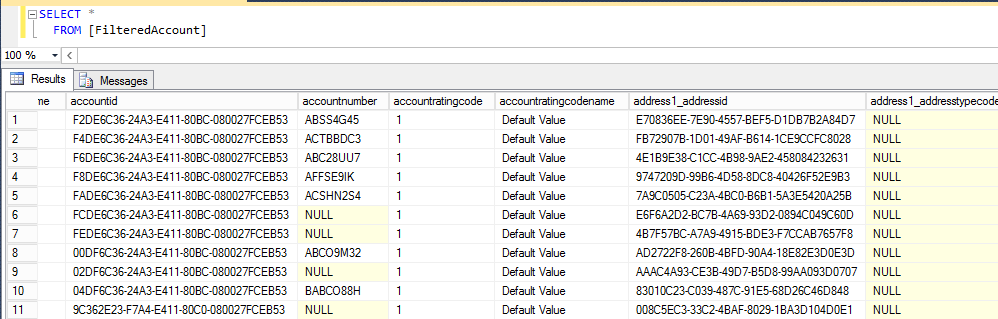
Selecting from the filtered view returns the results, e.g.

Custom entities also have filtered views:

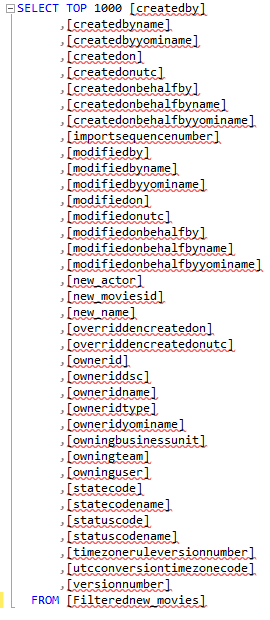
The views have standard fields as well as new fields:

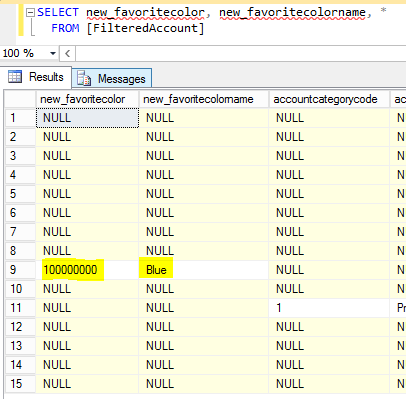
Option set fields appear in filtered views as two SQL fields, one for the value and one for the label:

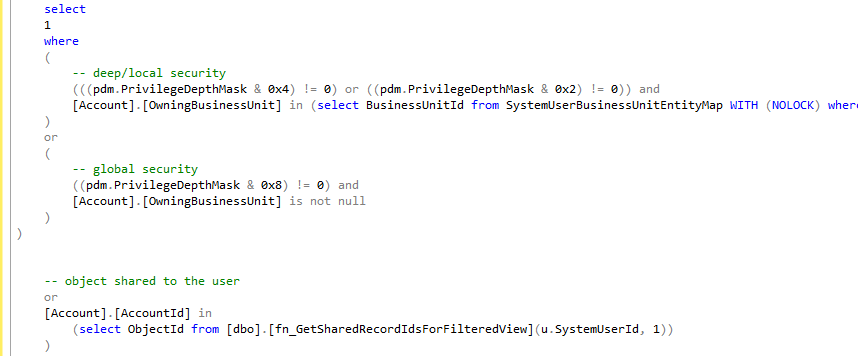
Scripting the filtered view, we can there are functions that ensure CRM security is met when a user tries to access the view:

Dynamics CRM tables can be accessed directly, for example if you want to access the account entity you can query the AccountBase, or new_entityBase for custom entities.

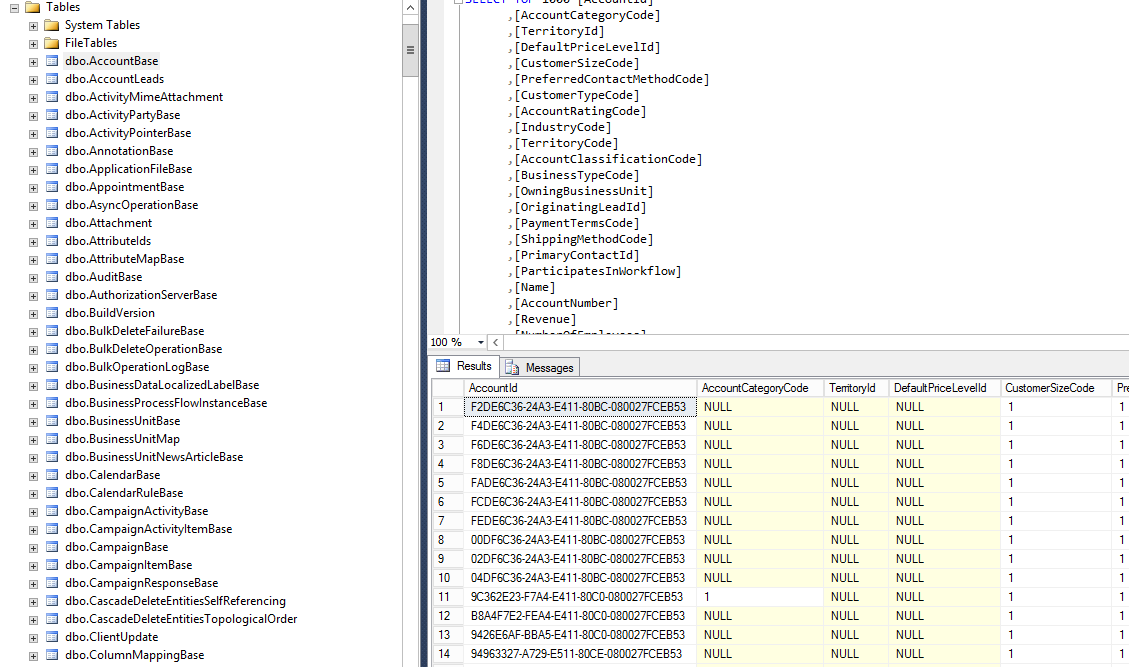
However, filtered views are the preferred way of accessing data due to its built in security. Note all fields in the filtered view are lower case, vs the entity table which is mixed case.

Abstract class and Abstract methods

 In C#, an abstract class is a class that cannot be instantiated directly and serves as a base class for other classes. Abstract methods are methods declared within an abstract class that do not have an implementation (no method body). They are essentially contracts that derived classes must fulfill by providing their own implementation. 

Abstract Class
  • Declared using the abstract keyword before the class keyword. 
  • Cannot be instantiated (you cannot create objects of an abstract class). 
  • Acts as a blueprint or template for other classes, providing a common structure and behavior. 
  • Can contain both abstract and concrete (non-abstract) methods. 
  • Abstract methods force derived classes to implement specific functionality. 
  • Abstract classes can inherit from other classes (including non-abstract classes) or implement interfaces. 
Abstract Method
  • Declared using the abstract keyword within an abstract class. 
  • Must be part of an abstract class or an interface. 
  • Lacks a method body (no implementation). 
  • Derived classes are required to provide an implementation for the abstract method using the override keyword. 
  • Abstract methods are implicitly virtual, so the virtual keyword is not needed when declaring them. 
  • override keyword is necessary in the derived class to provide the implementation. 
Example:
Code
public abstract class Animal{    public abstract string GetSound(); // Abstract method    public virtual void Move()  // Concrete method    {        Console.WriteLine("Moving...");    }}public class Dog : Animal{    public override string GetSound()    {        return "Woof";    }    public override void Move()    {       Console.WriteLine("Dog is running");    }}public class Cat : Animal{    public override string GetSound()    {        return "Meow";    }}public class Program{    public static void Main(string[] args)    {        //Animal animal = new Animal(); // This will cause a compile-time error because Animal is abstract        Dog dog = new Dog();        Cat cat = new Cat();        Console.WriteLine($"Dog says: {dog.GetSound()}"); // Output: Dog says: Woof        dog.Move(); // Output: Dog is running        Console.WriteLine($"Cat says: {cat.GetSound()}"); // Output: Cat says: Meow        cat.Move(); // Output: Moving... (inherited from base class)    }}
In this example, Animal is an abstract class with an abstract method GetSound() and a concrete method Move()Dog and Cat are derived classes that inherit from AnimalBoth Dog and Cat must implement the GetSound() method, while Dog also overrides the Move() method to provide its specific implementation. The Main method demonstrates how to create instances of the derived classes and call their methods. Trying to create an instance of the abstract class Animal directly would result in a compile-time error. 

Wednesday, 25 June 2025

Retrieve records using liquid template in power pages

 To retrieve a record from an entity using Liquid code in a Power Pages or Dynamics 365 portal, you can use the entities object and its associated tags, often in conjunction with FetchXML or OData queries. The basic approach involves identifying the entity, optionally filtering the records, and then accessing the desired attributes of the retrieved record. 

Here's a breakdown of the key aspects:

1. Identify the Entity and Record:
  • Entity Name:
    Determine the logical name of the entity you're working with (e.g., accountcontactnew_customentity). You can find this in the Power Platform admin center or through the API. 
  • Record Identifier:
    You'll typically need a way to identify the specific record you want to retrieve. This could be a GUID (Globally Unique Identifier), a unique field value, or based on a filter within a FetchXML or OData query. 
2. Using entities and Liquid Tags:
  • Accessing the entities object:
    Liquid provides access to the entities object, which allows you to interact with Dataverse records.
  • Fetching Records:
    You can use FetchXML or OData queries within Liquid to retrieve records. For example:
    • FetchXML: {% fetchxml my_query %} <fetch version="1.0" output-format="xml-platform" mapping="logical" distinct="false"> <entity name="account"> <attribute name="name" /> <filter type="and"> <condition attribute="accountid" operator="eq" value="{{ record_id }}" /> </filter> </entity> </fetch> {% endfetchxml %} 
    • OData: {% assign record = entities.account | where: "accountid", record_id | first %} 
  • Accessing Attributes:
    Once you have the record (e.g., record in the above examples), you can access its attributes using dot notation:
    • {{ record.name }} (for the name attribute)
    • {{ record.primarycontactid.name }} (if primarycontactid is a lookup field) 
3. Example using FetchXML: 
Code
{% fetchxml my_query %}<fetch version="1.0" output-format="xml-platform" mapping="logical" distinct="false">  <entity name="account">    <attribute name="name" />    <attribute name="telephone1" />    <filter type="and">      <condition attribute="accountid" operator="eq" value="{{ request.params.accountid }}" />    </filter>  </entity></fetch>{% endfetchxml %}{% for account in my_query.results.entities %}  <h2>{{ account.name }}</h2>  <p>Phone: {{ account.telephone1 }}</p>{% endfor %}
4. Example using OData:
Code
{% assign account_id = request.params.accountid %}{% assign account = entities.account | where: "accountid", account_id | first %}{% if account %}  <h2>{{ account.name }}</h2>  <p>Phone: {{ account.telephone1 }}</p>{% else %}  <p>Account not found.</p>{% endif %}
5. Important Considerations:
  • Permissions:
    Ensure that the web roles assigned to the portal users have the necessary table permissions to view the entity and its attributes. 
  • Performance:
    When dealing with large datasets, optimize your queries (FetchXML or OData) to retrieve only the necessary columns using $select and $expand options. This can significantly improve performance. 
  • Error Handling:
    Implement error handling (e.g., checking if a record exists before accessing its attributes) to provide a better user experience. 
  • Related Records:
    When working with lookup fields, you can retrieve related records using the same entities object and appropriate filtering. You can also use $expand in OData to retrieve related records in the same query. 
  • Web Templates:
    Liquid code for retrieving and displaying data is often used within web templates, which are then associated with web pages or other components. 

How to Call an Action through Power Automate(MS Flow)

  Introduction As Microsoft is providing us more flexibility with Power Automate (MS Flow), recently we found that now we can call the Actio...