Showing posts with label SSRS Report. Show all posts

Friday, 10 May 2024

SSDT for Visual Studio (VS) 2015

In this course, we will learn to implement and build a SSRS Report in Dynamics CRM. The Microsoft’s Dynamics 365 CRM and Model Driven PowerApps offers various number of advanced reporting tools. These advanced reports are often necessary when client requirements demand complex calculations, retrieving data from different data sources, grouping large sets of data based on rules, and returning multiple data sets.  The Dynamics CRM out-the-box reporting system is not fully capable of driving such complex logics, hence we use SSRS Reports to suffice the above requirements. Lets start with building your own SSRS Report from scratch.

SSDT for Visual Studio (VS) 2015

Click here to download SSDT for Visual Studio (VS) 2015. 


When the download is complete, run the SSDTSetup.exe (as administrator) program to install the tool.  When prompted, choose to install SQL Server Reporting Services and click on next as shown below.


Dynamics 365 Report Authoring Extension

The Dynamics 365 Report Authoring Extension is an addon for SQL Server Data Tools that will allow you to write reports using the FetchXML .  Currently, this is the only way to write SSRS reports that can access Dynamics 365 Online data directly.

Click here to download the Dynamics 365 Report Authoring Extension. Extract the package and install it in your system.


Create a new SSRS Report

We will create a new SSRS report from scratch using the above downloaded tools.

Create a Reporting project.

Launch the SQL Server Data Tool (SSDT) 2015 as shown below.


Click on Files >> New >> Project and create a new Project with the Projecting Services as “Report Server Project”, framework as “.Net Framework 4.5.2” or above as shown below.


Add a report in the project file.

In the project, right click on the folder called “Reports” >> Add >> New. Select the Report Project type as “Report” and click on Add.


Now we have added a new blank report to our reporting project file. Here you will observe the reporting components such as Data Sources and Data Sets are populated in the Report Data section as shown below.


Add Data Source to your report.

We have to give a data source to your SSRS report. In our case, the Dynamics 365 environment will act as a data source. Right click on the Data Sources >> Add Data Source. In data source, select the Embedded Connection type as Microsoft Dynamics 365 Fetch and enter the CRM Dynamics URL in connection string. (Note : – This is the above downloaded Add-On). Click on Ok.


Add a Data Set to your report.

Once the data source is added, now its the time to add the data set. The data sets are the tables which are used to store the data from the data source. As our data source in Dynamics CRM, you will use the fetch XMl as your data set.

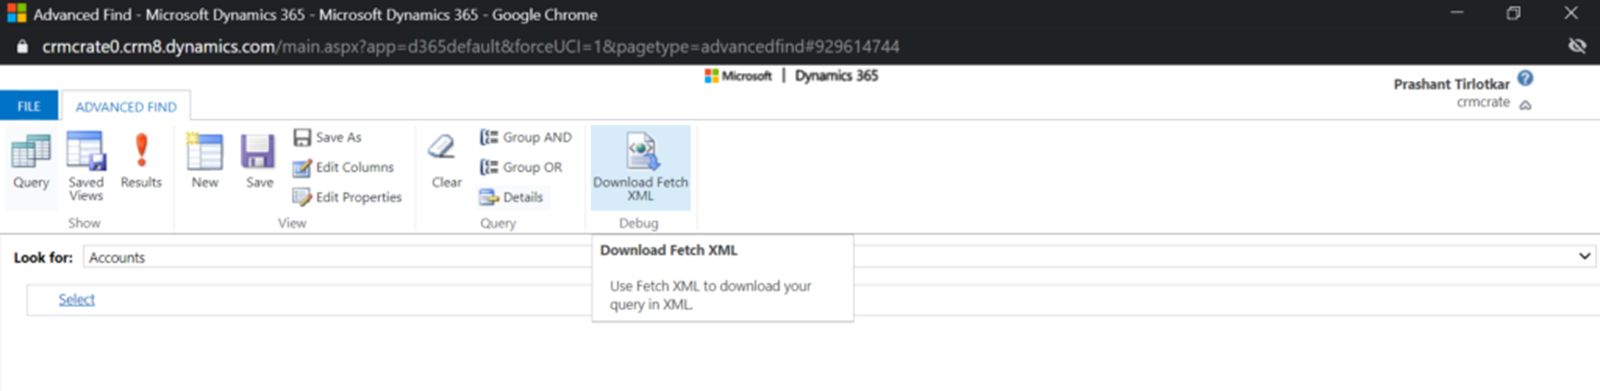
Consider the scenario where you have to create a SSRS Report to display data of Account entity. To do so, navigate to CRM >> Advance Find >> Query the Account entity (Add the columns as per your need) and click on Download Fetch XML as shown below.
Copy the downloaded Fetch XML, navigate back to report project, right click on the Datasets >> Add Dataset. Select the above created Data Source, set Query Type as Text and paste the above downloaded Fetch XML query in the Query text area as shown below. Click on Ok.


Once you click on Ok, the SSDT data set will get connected with your Dynamics CRM. Enter the credentials and help SSDT will establishing the connection.


Now, you can see the data set is successfully created in form of tables as shown below.
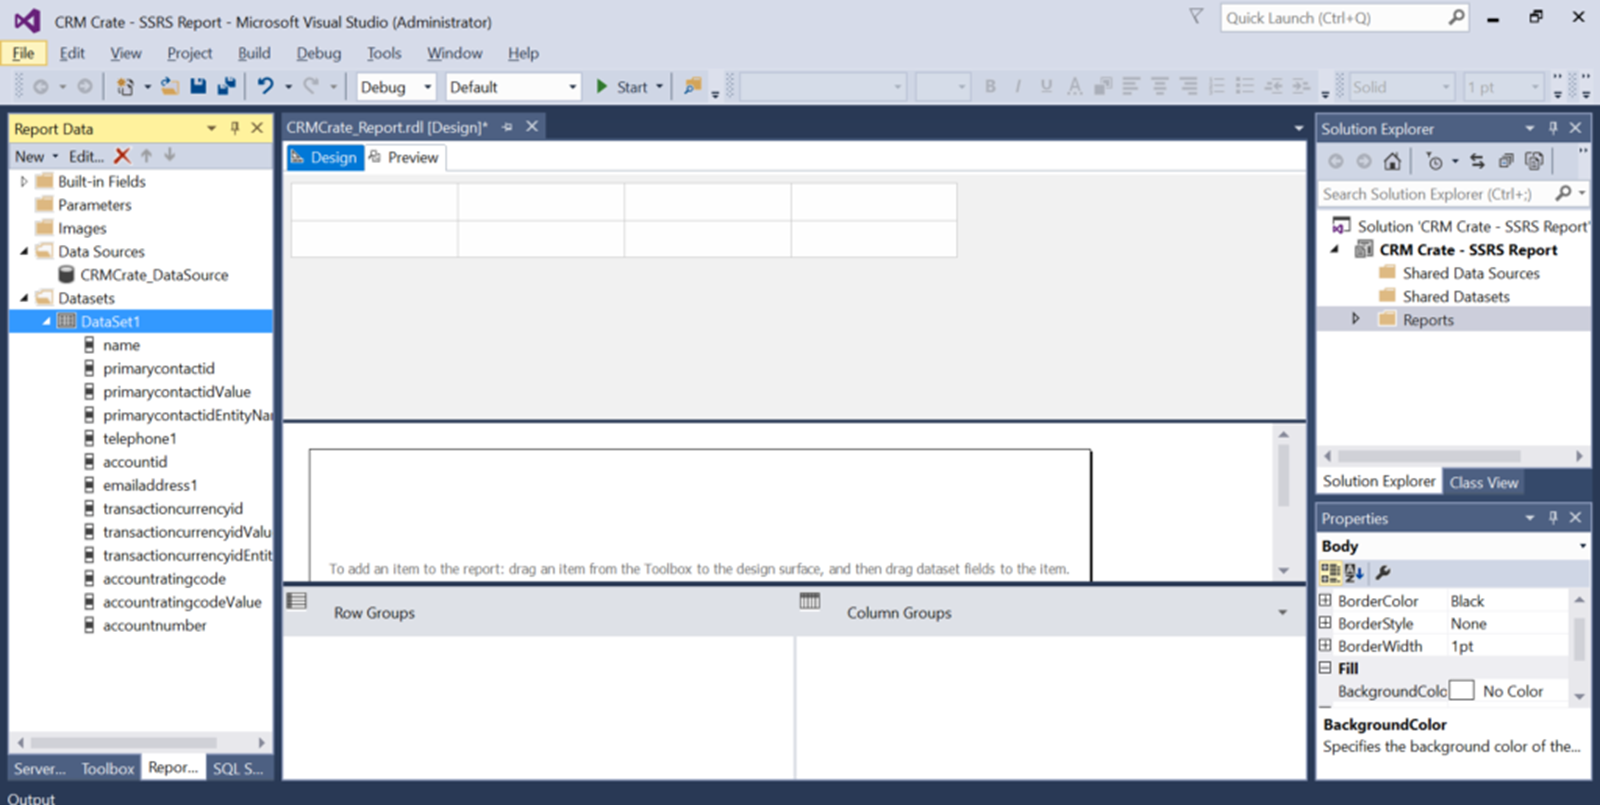


Create a table and insert data.

In the same project, open the tool box, select component “Table” and drag it in the designer panel as shown below.

You can add multiple rows and columns by right clicking on table >> Add new Row / Column. Below is the table created for demo purpose
Right click on the Table/ Tablix >> Tablix Properties and select the data set which was created above


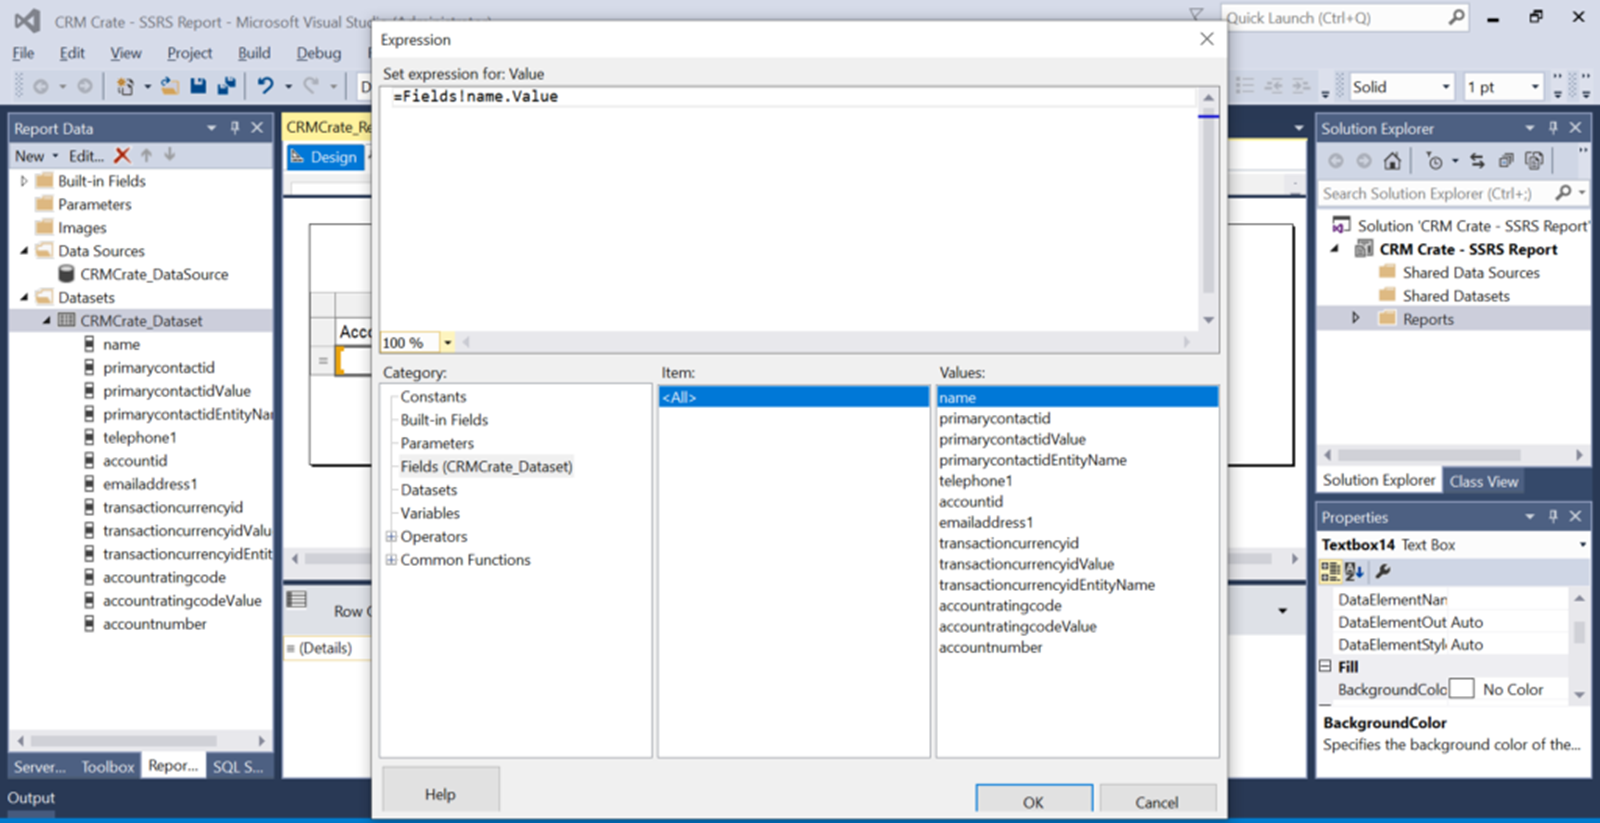
Lets add the data to our table, right click on the below row component and select “Expressions”.


We can perform complex operational logics and calculation with of the Expressions. In Expressions, navigate to the section called “Fields”. Here you can find all the fields or columns available in the data set. Add the expressions (Fields mapping) in each of the rows as per your need.


Now our table is ready with the necessary data. Lets deploy this table in the Dynamics CRM.

Deploy the SSRS Report in Dynamics 365 CRM
Rebuild the above created report and go the project’s local folder and copy the .rdl file (Report Defination File) as shown below.


Now, navigate back to the Dynamics CRM. Open the Advance Find >> Reports >> New Report. Select report type as “Existing File”, upload the above obtained .rdl file in this section. We have done the categorization in order to display the report in Account entity’s report section as shown below. Click on Save.


Now, the report is deployed in Dynamics CRM.

Test the deployed SSRS Report

In CRM, navigate to the Account record >> Ribbon Bar >> Run a Report. In the section “Run a Report”, you will find the report which we have created above.


Creating SSRS Report for Dynamics 365 Online and Model Driven Power Apps

 Microsoft Dynamics 365 online and Model Driven PowerApps offers several advanced reporting options. Advanced reports are often necessary when business requirements demand complex calculations, returning multiple data sets, grouping large sets of data based on rules, and retrieving data from different data sources.  Before creating an advanced report using SSRS, you may also consider using Advanced Find, Dashboards and Charts, or the Report Wizard in Model Driven PowerApps/D365 Online.

In my experience, the out of the box reports offered by Dynamics 365 are not often used and in most cases, there is a need for custom reports. In such a situation, SQL Server Reporting Service reports offer much flexibilities as compared to Dynamics 365 Report wizard and creating SSRS reports does not warrant any particular development skill.

Watch Video: Microsoft Dynamics 365 – Reporting

In this article we are going to show that with some basic knowledge you can create a report using SSRS (SQL Server Reporting Services) for Model Driven PowerApps very quickly.

Pre-Requisites:

Optional Requisites

  • XrmToolBox to connect to the Common Data Service for Apps (CDS)
  • FetchXML Builder Plugin for XrmToolBox, to create and execute queries against CDS and Dynamics 365/CRM data.

Once we have downloaded and installed above required, we are ready to start Creating SSRS Report for Dynamics 365 Online/Model Driven PowerApps.

SSRS Reports Using Fetch XML in Dynamics 365

  • Open Visual Studio 2015 and start a New Project. Select Templates > Business Intelligence > Report Server Project
  • Specify project Name and Solution Name. Click Ok.
  • Now expand Solution Explorer > Right Click on Reports Folder > Add > New Item From the Add new Item Window Select Report > Provide a Name > Click on Add
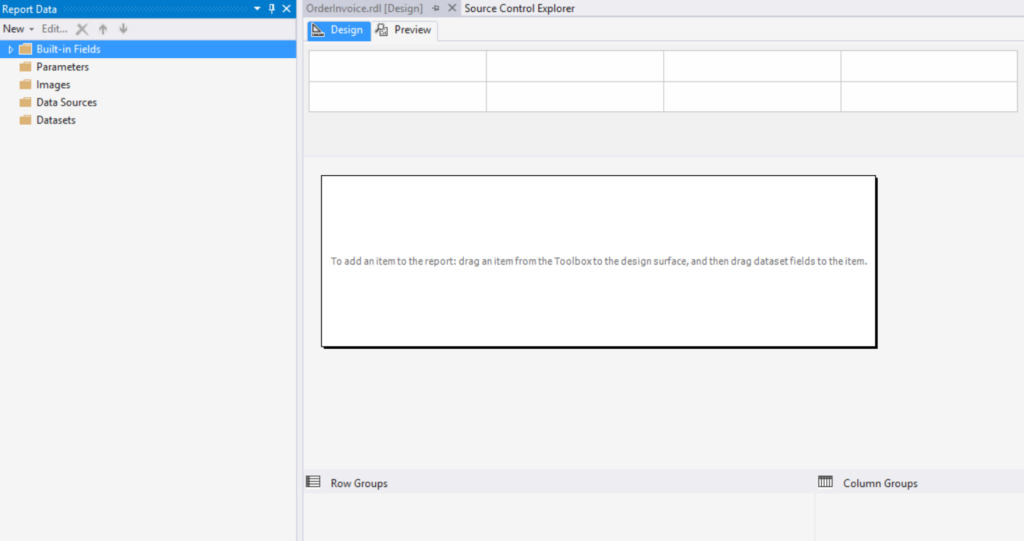
  • Once the report is added you should see the following screen.
Creating SSRS Report for Dynamics 365 Online and Model Driven Power Apps

Adding Parameters

  • You can add parameters to a report to define a report’s individual parameters, pass information through a query, or provide access to user settings, such as CRM_CurrencySymbol and CRM_CurrencyPositivePattern parameters.
  • From Report Data Toolbar expand Parameters and right click to add parameters.
Hidden parameters
  • The Report Designer in Visual Studio has built-in support for hidden parameters. In addition, you can hide parameters by adding a CRM_ prefix to the parameter name in a report. By default, the parameters with a CRM_ prefix are hidden when the report is published. When you run the report, you aren’t prompted to enter parameter values for the hidden parameters.
Special parameters

The following table shows the special hidden parameters that you can use in your reports.

ParameterDescription
CRM_FilterTextContains the value of the filter text that a report user interactively creates in the Report Viewer when the user runs a report. The parameter is in a filter summary text box that is located in the report header. The initial value is set to the default filter.
CRM_URLSet to the URL of the app. Use this parameter when drilling through.
CRM_Filtered[Entity]Use in a query expression to enable data pre-filtering (through Advanced Find). You should replace [Entity] with your Actual entity name for which the report is being developed

You must create all parameters in a report before you can refer to them. The values of these special parameters are filled in by Customer Engagement (on-premises) when you run the report.

Also read : Dynamics 365 Integration Service

Adding Data Source to The Report

  • From Report Data Toolbar expands Data Sources and right-click to add new data sources. Specify the following at Data Source Properties window.
    • Provide a proper Name and select Embedded Connections
    • Select the Type as Microsoft Dynamics 365 Fetch
    • In the connection, string section put your D365 URL
    • From the left navigation click on Credentials and Use your Username and Password or Select Prompt for credentials if you don’t want to store the credentials.
    • Click OK

Adding Data Set to The Report

  • From Report Data Toolbar expand Datasets and right click to add new data set.
  • Specify Name and select the Data source created on previous step.
  • Select the Query type as Text.
  • Use FetchXML Builder to create Fetch XML and paste the same here in the Query text.
  • Apply prefilter and filters as per requirement.
  • Make sure to remove page size attribute from fetch XML if present as these is not supported.

Designing the report

  • Once all the above steps are completed, we are ready to design the report.
Creating SSRS Report for Dynamics 365 Online and Model Driven Power Apps
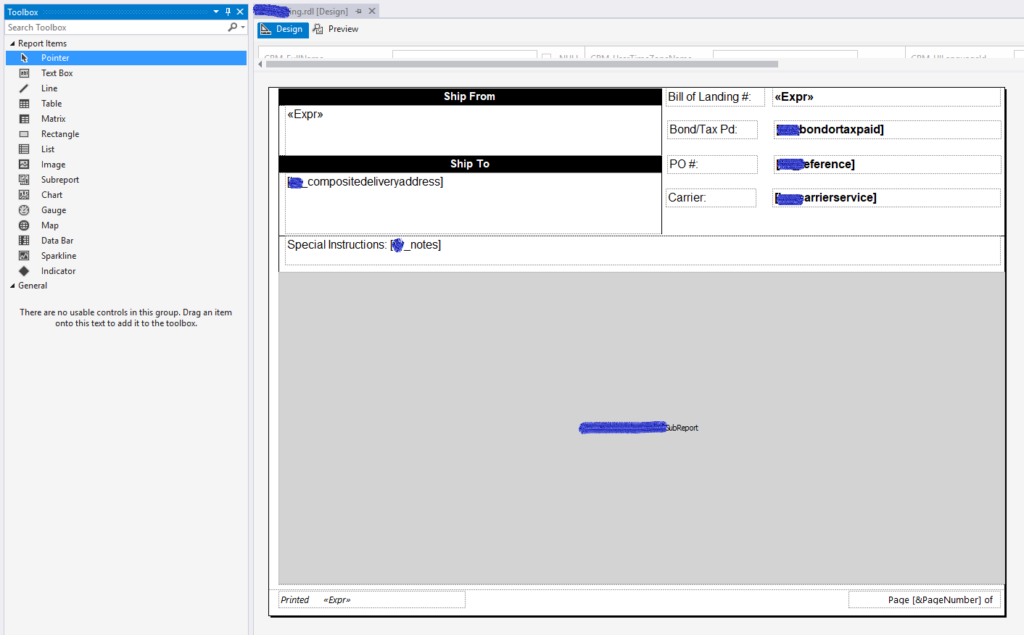
  • Use the Toolbox and the Dataset to create the report as per your requirement.

Build and Publish the Report

Build the RDL file
  • In the Solution Explorer, right-click on the Project and click Properties.
  • In the Solution Explorer, right-click on the Project and click Build or Rebuild.
  • In the Solution Explorer, right-click on the Solution and click Open Folder in File Explorer.
  • You will find the RDL file placed in the ..\[Project Folder]\bin\Debug folder.
Import the RDL file in Dynamics 365:
  • In Dynamics 365, open the Reports section and click New.
  • In the New Reports form.
  • Select Report Type as Existing File.
  • Click Choose File to select the RDL file.
  • Specify Name.
  • Select Display In as per your requirement.
  • Click Save and Close, this will import the report in the Available Report List, from where you can now run the report.

Open the Report

  • Go to the entity form for which you have chosen the report.
  • Click on the 3 dots symbol if Run Report button is not available in ribbon of the form.
  • In Run Report section you should be able to view the report.
  • Click on the report to run it.

The goal of this article was to demonstrate how quickly you can leverage SSRS reporting capability and apply it to your Dynamics 365 information set. It is really onto you to experiment and explore how you can exploit all the features of SSRS reports and we may talk about that in some later post. Meanwhile, enjoy creating reports and stay in touch if you need any further assistance.

Identify all the cloudflows on a particular entity along with its messages

  The easiest way to identify the flows that trigger on a particular entity with its messages is to run a SQL query using the sql4cds tool i...