Thursday, 10 July 2025

No lock and distinct conditions in query expression


Hi Folks,

Whenever i tried using query expression for retrieve multiple operations, came to know some interesting facts which exists and hence would like to share with you all.

As you already know Query expression was used when dealing with a little complex query, lets see this in action

Basic Query Expression Example


// Query using ConditionExpression and FilterExpression
ConditionExpression condition1 = new ConditionExpression();
condition1.AttributeName = "lastname";
condition1.Operator = ConditionOperator.Equal;
condition1.Values.Add("Brown");
FilterExpression filter1 = new FilterExpression();
filter1.Conditions.Add(condition1);
QueryExpression query = new QueryExpression("contact");
query.ColumnSet.AddColumns("firstname", "lastname");
query.Criteria.AddFilter(filter1); query.NoLock = true;//Condition to prevent occurrence of deadlocks, distinct was used to retrieve unique columnsets in the query
EntityCollection result1 = _serviceProxy.RetrieveMultiple(query);

The benefit of setting NoLock to true is that it allows you to keep the system from issuing locks against the entities in your queries; this increases concurrency and performance because the database engine does not have to maintain the shared locks involved. The downside is that, because no locks are issued against the records being read, some “dirty” or uncommitted data could potentially be read. A “dirty” read is one in which the data being read is involved in a transaction from another connection. If that transaction rolls back its work, the data read from the query using NoLock will have read uncommitted data. This type of read makes processing inconsistent and can lead to problems. The risk of having “dirty” data is something to consider, especially in high database transaction environments.

Reference: https://msdn.microsoft.com/en-us/library/microsoft.xrm.sdk.query.queryexpression.aspx 

Wednesday, 2 July 2025

How to Call an Action through Power Automate(MS Flow)

 Introduction

As Microsoft is providing us more flexibility with Power Automate (MS Flow), recently we found that now we can call the Action through Power Automate (MS Flow) directly. Previously we used to call an Action through HTTP request, but now we can directly call an Action through the Power Automate (flow) steps.

Before that take a short look at what are Bound and Unbound Action?

Bound Action are targeted to the entity and Unbound Action are not bound to the any entity, they are Global.

To get the Bound and Unbound actions in Power Automate (MS Flow) follow the steps given below:

1. Create a solution in https://make.powerapps.com/ where you have to add your Power Automate (Ms Flow) which we are going to use to call Actions.

Call an Action through Power Automate

2. In the solution click on new button & select Flow as shown in below image. Apparently it will redirect you to Power Automate (MS Flow) window as shown in the following image.

Call an Action through Power Automate

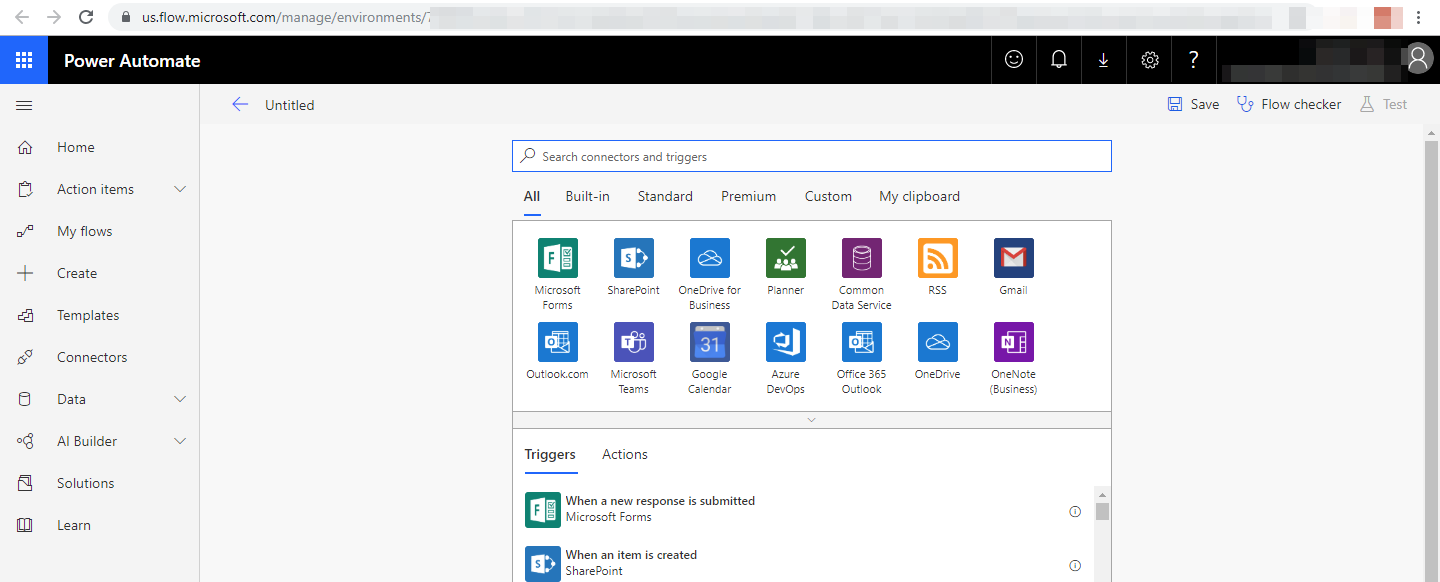
Power Automate

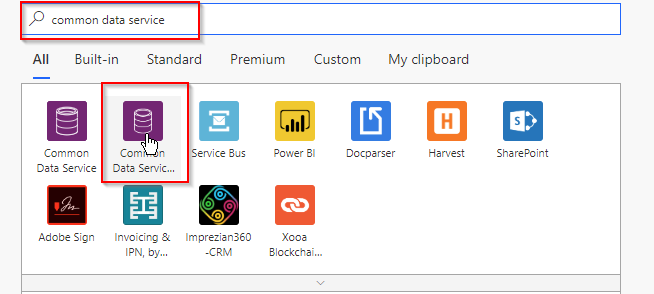
3. Now we have to Search for Common Data Service Trigger point in our newly created Flow & from the search result select the Common Data Service (Current Environment).
Select the trigger conditions as per requirements such as Create, Create or update, Delete, Update etc.

Call an Action through Power Automate

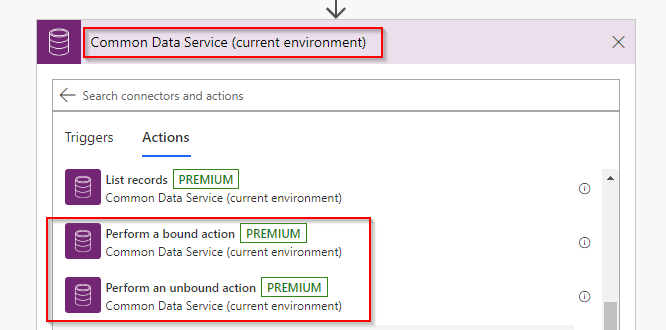
4. Now in the next step we have to search for the action & select the Common Data Service (Current Environment). You will get many new action points in the results from that we have to select Bound/Unbound Action.

Call an Action through Power Automate

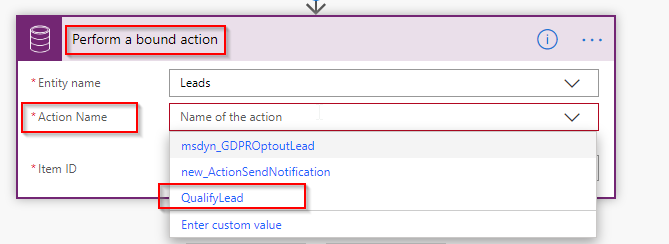
For the bound action you will see the Action step as shown in below image. In my case I have selected the QualifyLead action which is bounded with the Lead entity.

Call an Action through Power Automate

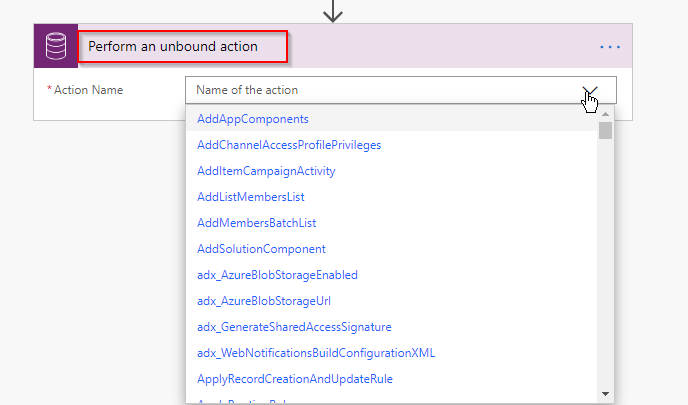
And for unbound step you will get to see the below window in which you can call your global action or the action which is not bounded with the any entity which will be listed in the unbound action.

Call an Action through Power Automate


Conclusion

As illustrated above, you can now directly call an Action through Power Automate (MS Flow).

Tuesday, 1 July 2025

Triggering a Microsoft Flow using a Webpage or HTTP GET Request

 There are several use cases where you may want to run a Microsoft Flow from a web page or sending an HTTP GET request. Let’s do this. We will create a flow that runs when a user accesses a web address and performs the action of posting to a Microsoft Teams chat.

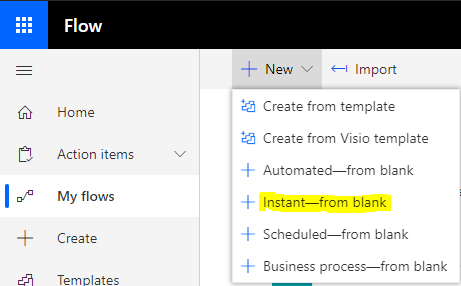
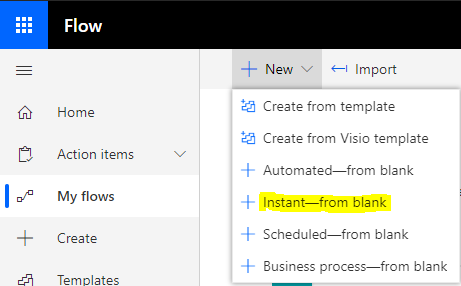
First, let’s create an Instant Microsoft Flow by going to https://flow.microsoft.com and selecting New->Instant – From Blank:

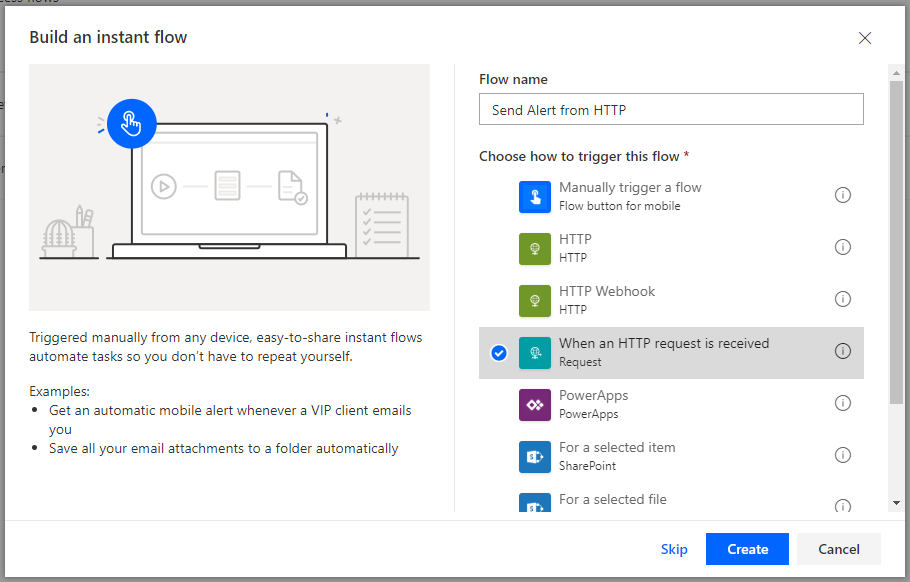
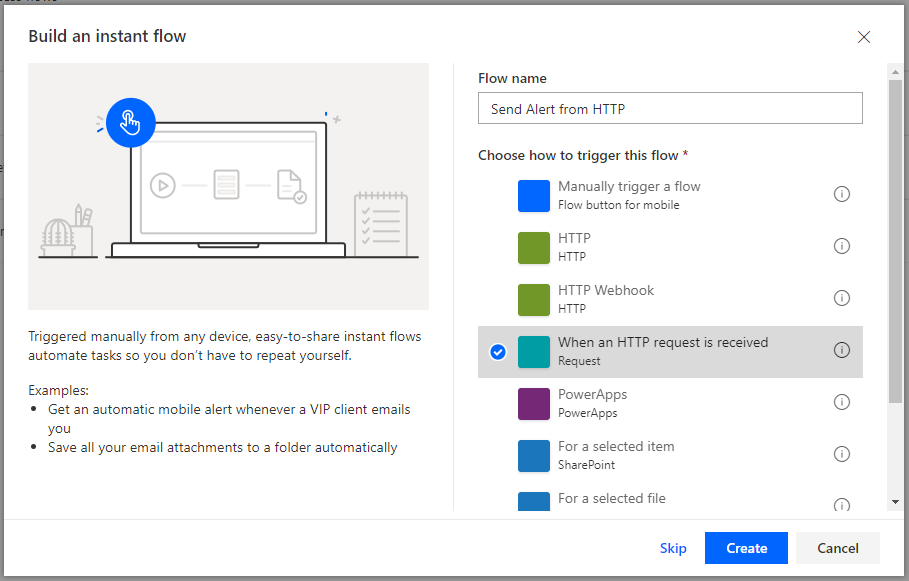
We will call the flow Send Alert from HTTP, and select When an HTTP request is received, then click Create:

This takes us to the Flow designer. Click New step:

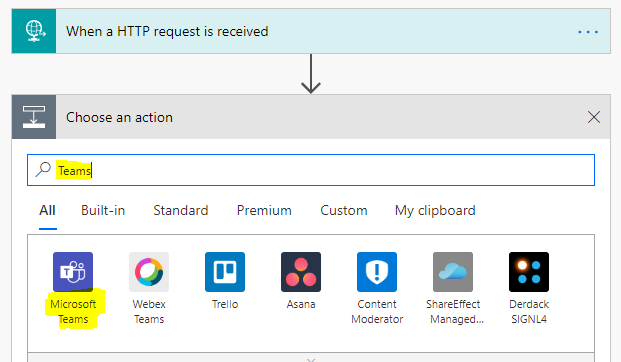
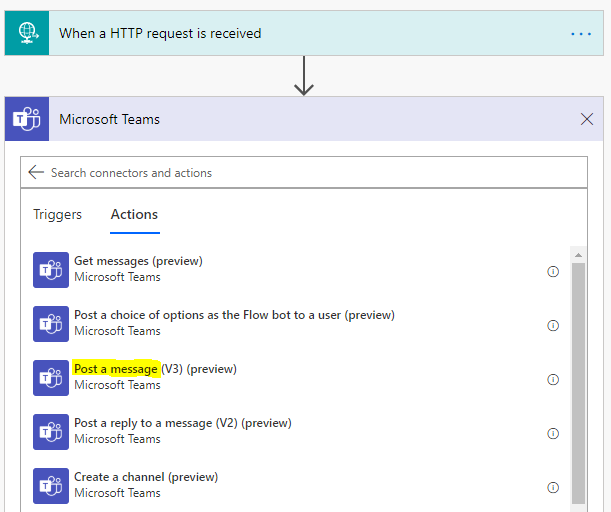
We will choose Microsoft Teams:

And Post a Message

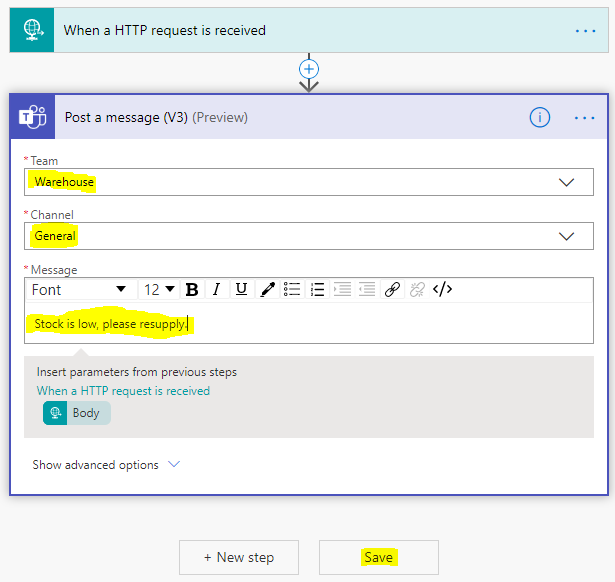
Now let’s fill in the details for our Teams message. We will post to our Warehouse Team, General Channel with the message “Stock is low, please resupply”:

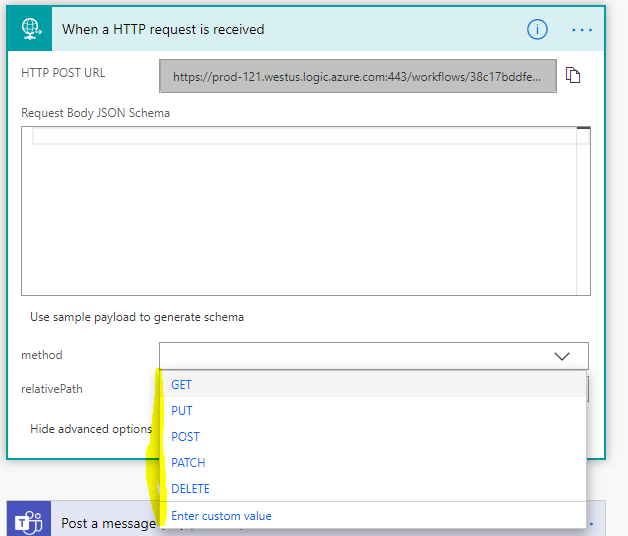
For the method, let’s choose GET:

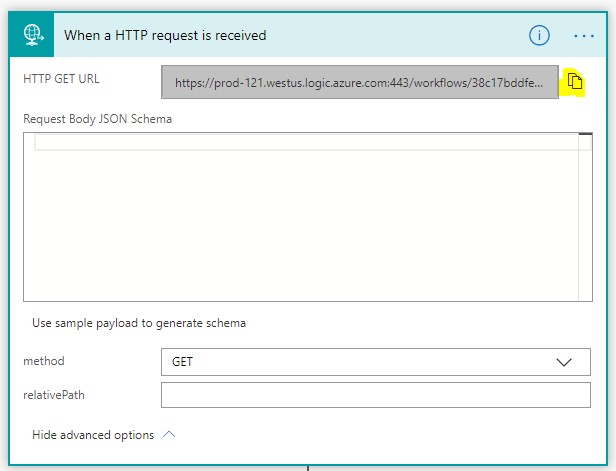
We can see an HTTP GET URL has been generated. Copy the link:

And let’s go to that web address by pasting it into a browser:

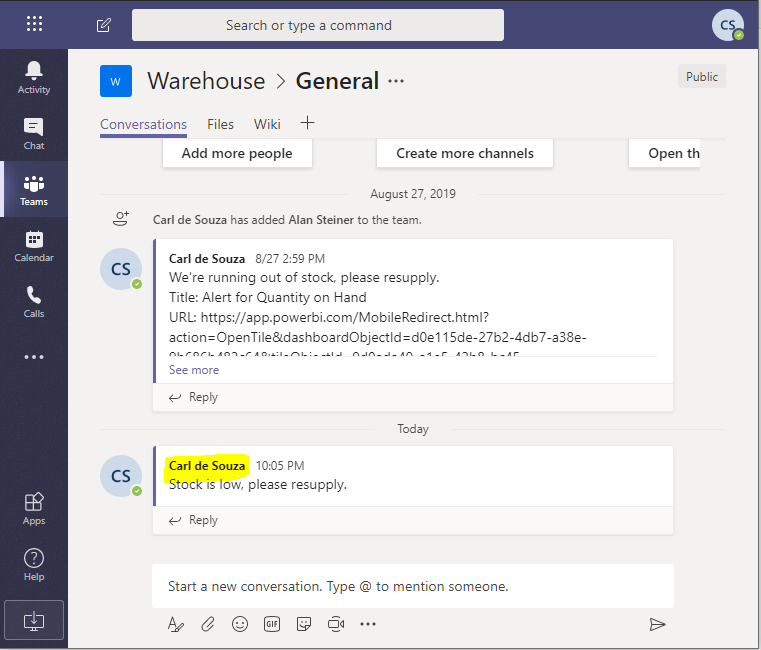
On hitting the web page, we can see our Flow is run and the message is posted to our Teams chat:


Triggering a Microsoft Flow POST Request from Postman

 In a previous post, we looked at how to trigger a Microsoft Flow using a GET request. In this post, we will show how to trigger a request using POST. We will do this using the Postman application to simulate our POST. We will use the same example as with the GET, where we post to a Microsoft Teams chat when the request comes in. Additionally, in our POST we will pass a variable and write it out to the chat.

First, create a new Microsoft flow by going to https://flow.microsoft.com and selecting New->Instant – From Blank:

We will call it Send Alert from HTTP and trigger When an HTTP request is received:

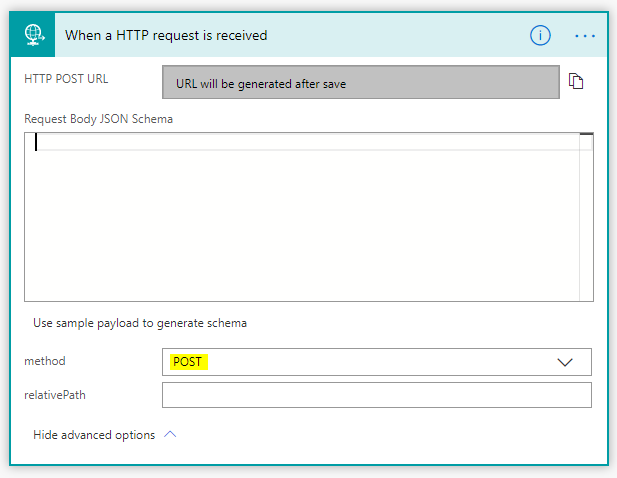
Now, you will see below. Set the method to POST:

Now when we send our POST request, let’s add some functionality to also send a variable in the body, which we will use in our post. Previously in our chat we wrote out “Stock is low, please resupply.”

Now let’s pass a Product variable to show which item is out of stock.

To do this, we will need to pass JSON in the body.

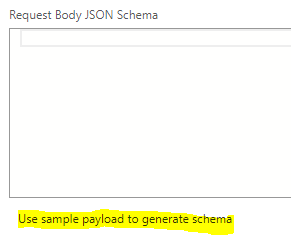
Select Use sample payload to generate schema:

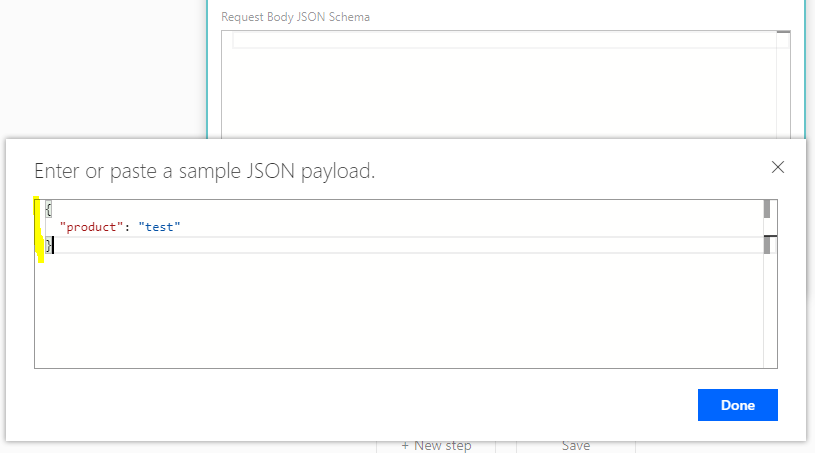
We want to pass our product, so it should look like:

{
  "product": "test"
}

Paste this in and click Done:

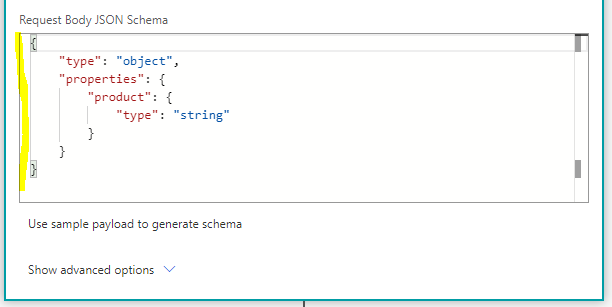
You will now see the schema generated:

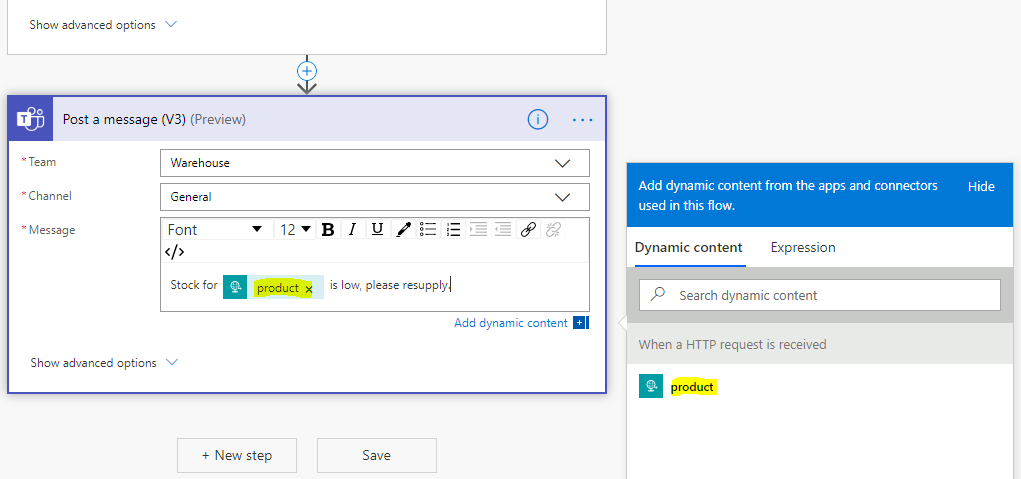
Next, click Add Step and add a Microsoft Teams Post Message action. We will see product appearing as Dynamic content now. Add that to the message for our chat:

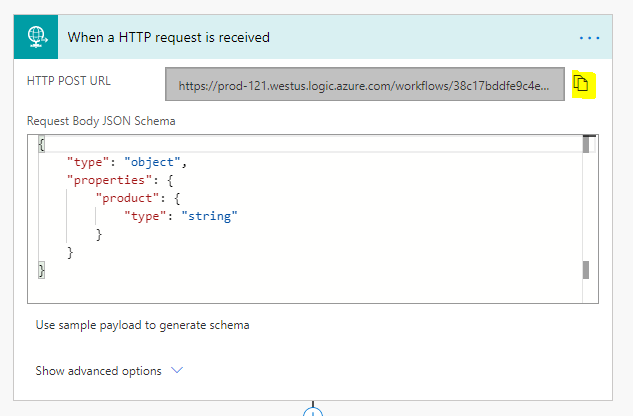
Click Save and we’re ready to run our Flow. Copy the HTTP POST URL:

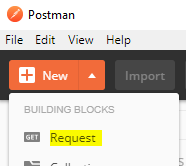
Open Postman and let’s create a POST request. Create a new request:

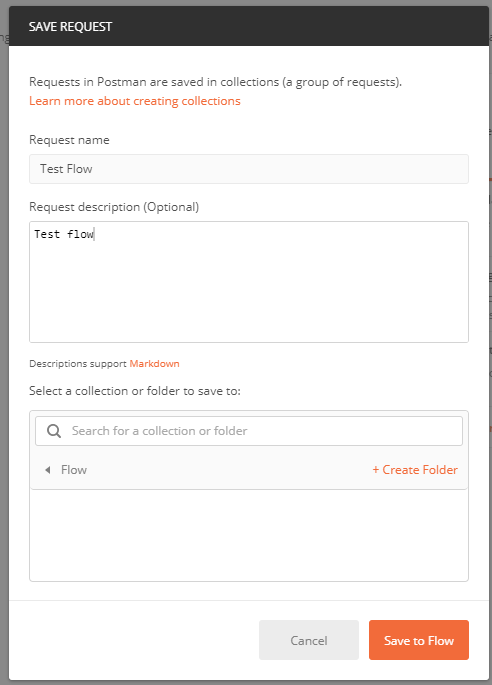
Give the request a name, etc and click Save to Flow:

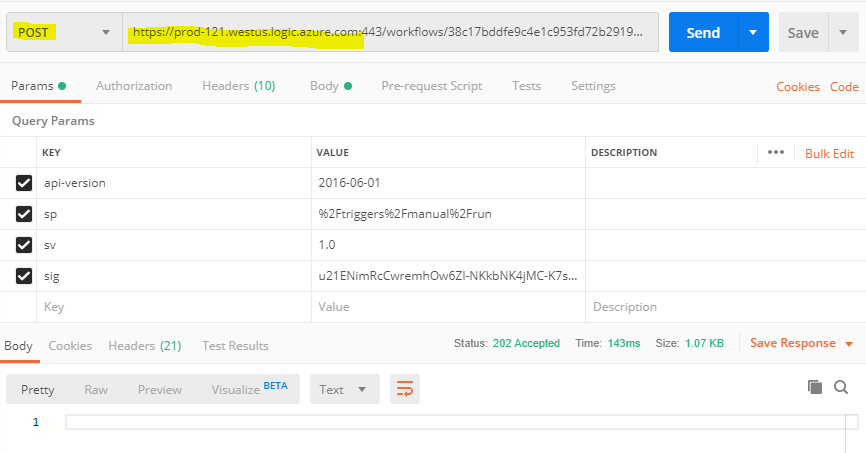
Set the request to POST and paste in the URL copied above:

Go to Headers and set key=Content-Type value=application/json:

In the body, pass in the JSON. We will send a product called ABC123. Press Send:

{
  "product": "ABC123"
}

On sending, we see in our Teams chat the request has come through:

How To Extract Data From Web Page Using Power Automate

 Power Automate cloud flows can be used to extract data from a web page. You can get the web page HTML by using an HTTP action and output its details with an AI Prompt. This technique will only work on web pages where text is included when the initial page is loaded. When the text is generated after the page loaded (JavaScript, client-side rendering, etc.) you will need to use Power Automate Desktop instead.

Introduction: The Get Contract Details Automation

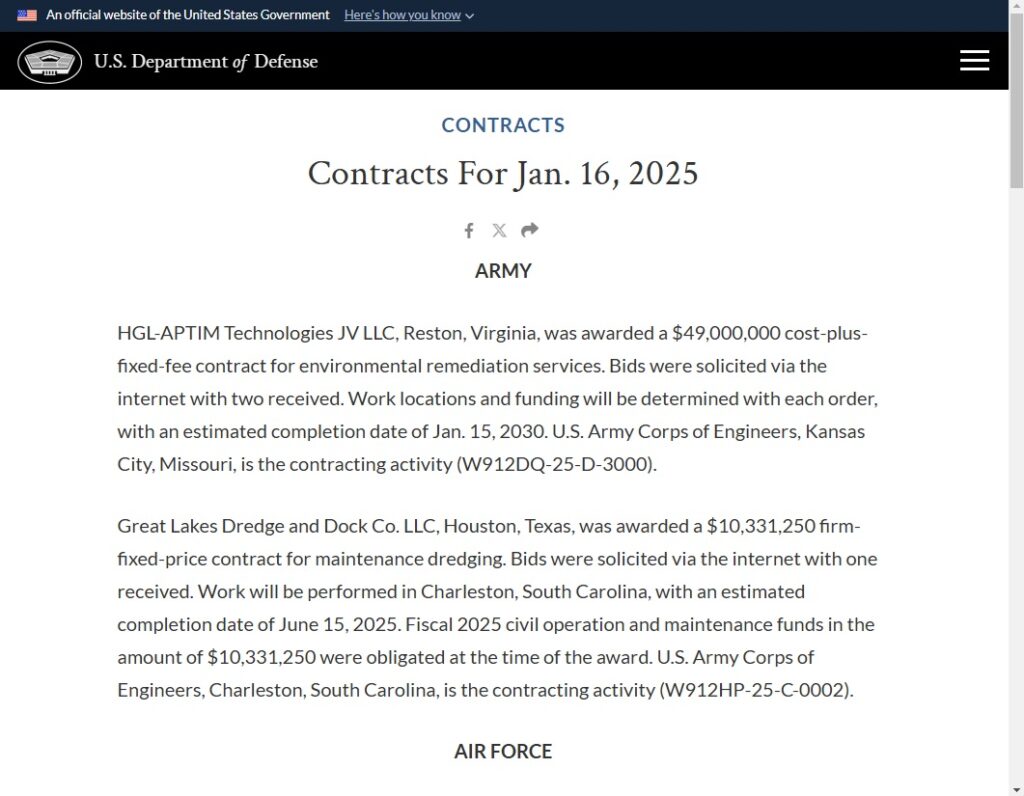
A construction firm uses a Power Automate cloud flow to read a government website and extract details about the contracts awarded each day.


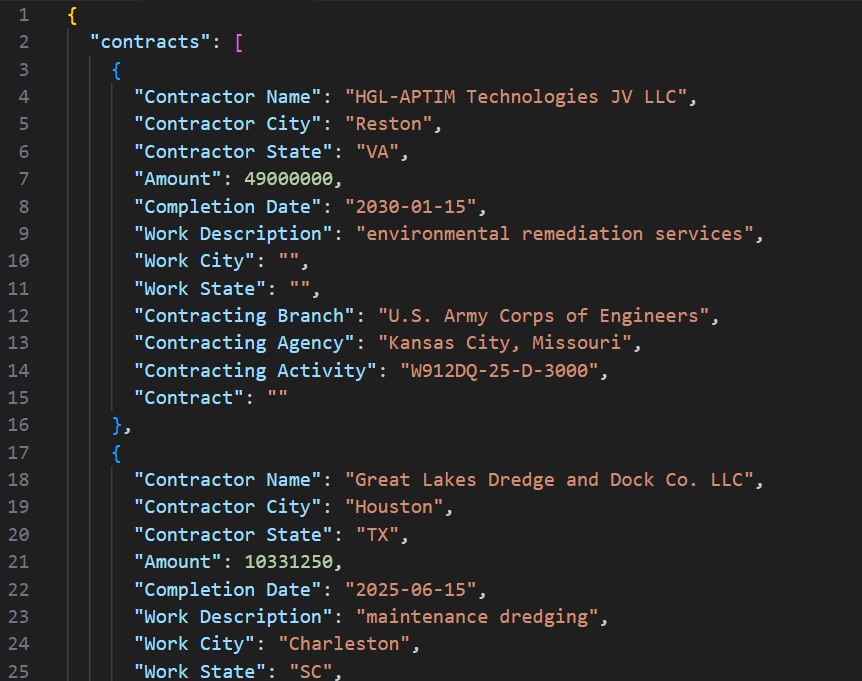
The contract details are output in JSON format. From there the construction firm can save the contracts to a SharePoint list, a Dataverse table, etc.


Get The Web Page HTML Using The HTTP Action

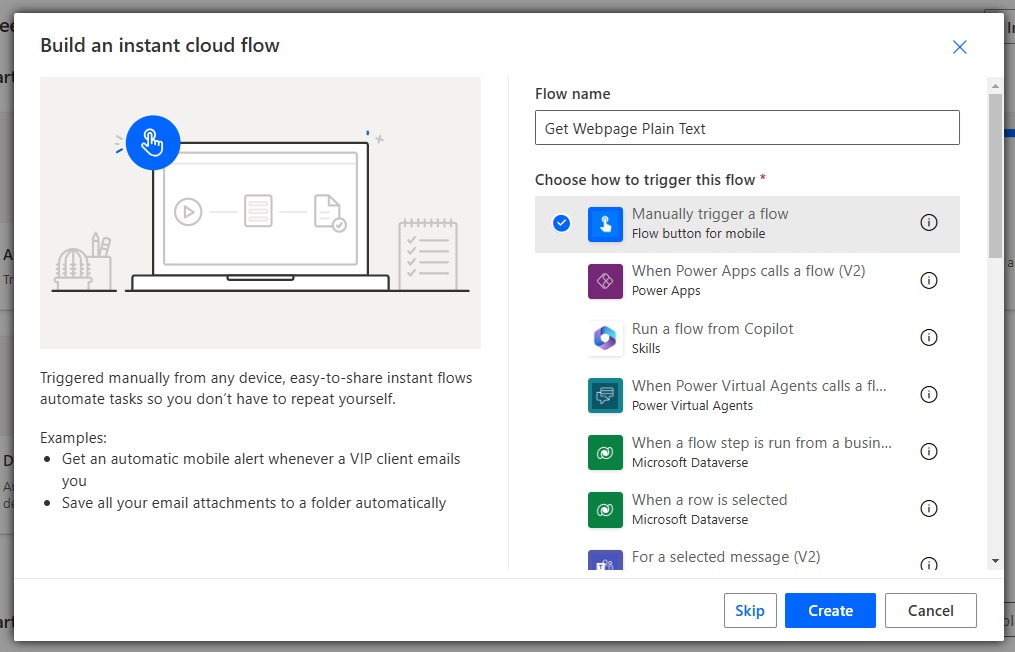
Open Power Automate and create a new instant flow named Get Webpage Plain Text.


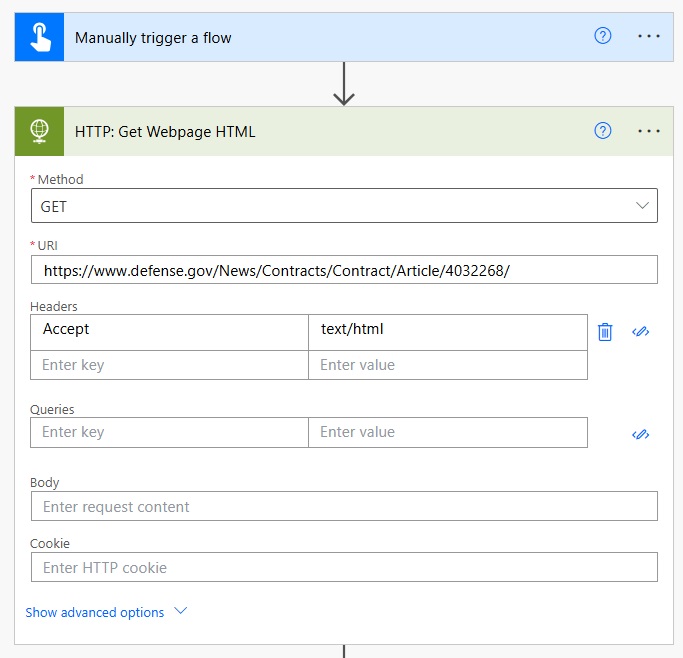
Add an HTTP action to the flow to get the web page HTML.


Use the GET method to request the web page.

GET


Input the URL of the website we want to extract data from.

https://www.defense.gov/News/Contracts/Contract/Article/4032268/


Then use the Header Accept text/html. This tells the server it should respond with the web page html.

KeyValue
Accepttext/html


Convert The Web Page HTML to Plain Text

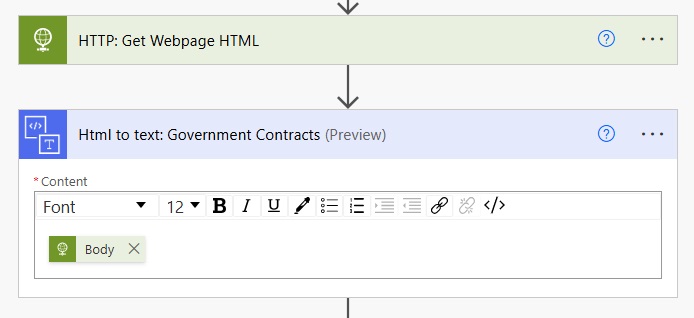
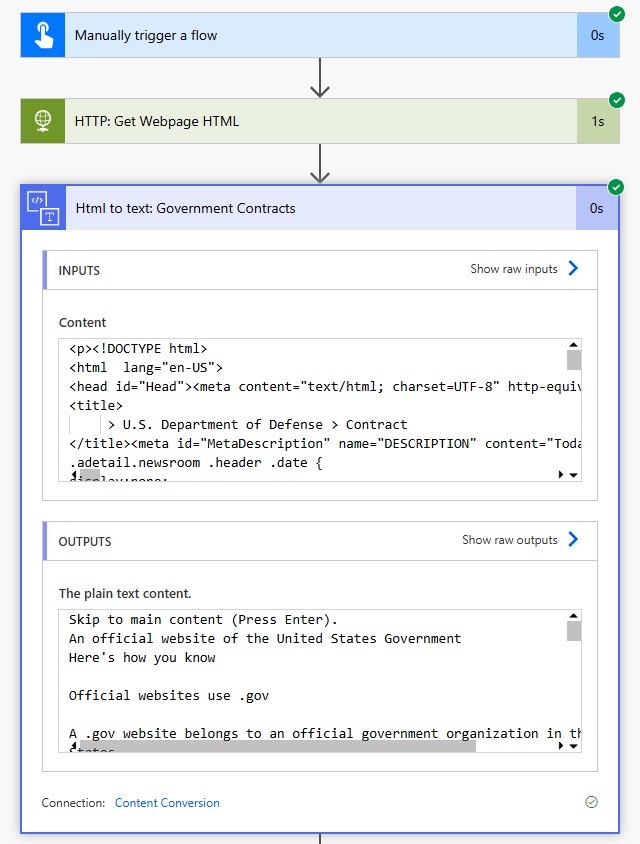
The HTTP action will return the HTML for the web page but we only want the text displayed to the user. Insert an HTML to text action into the flow. Then supply the body of the HTTP action into the content field.


The web page content is output as plain text with all of the HTML tags removed.


Create An AI Prompt To Extract Data From Web Page Text

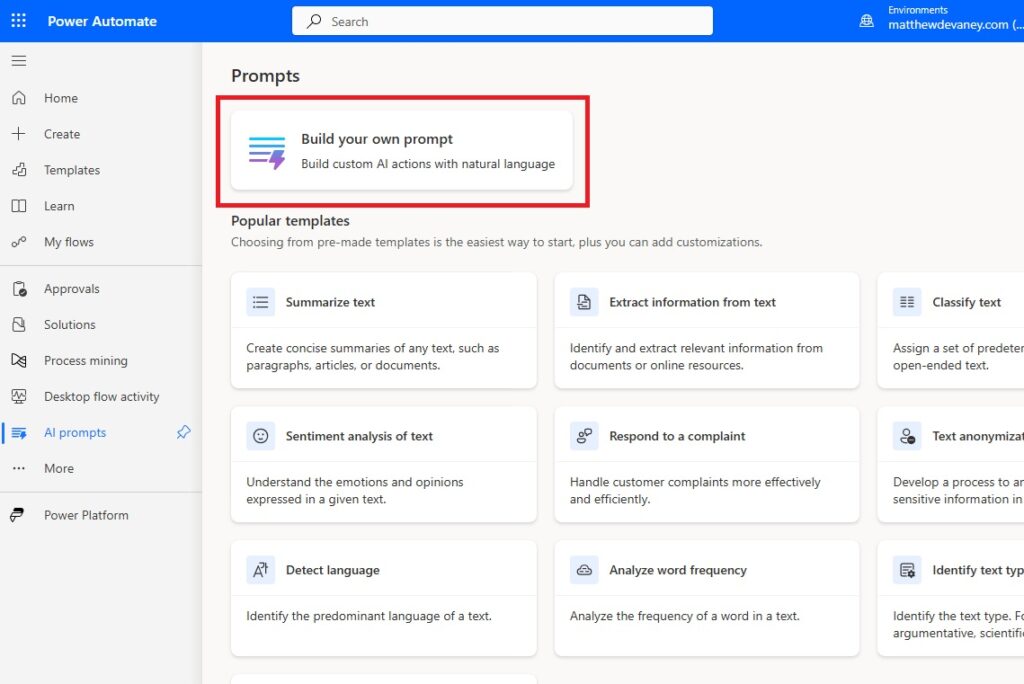
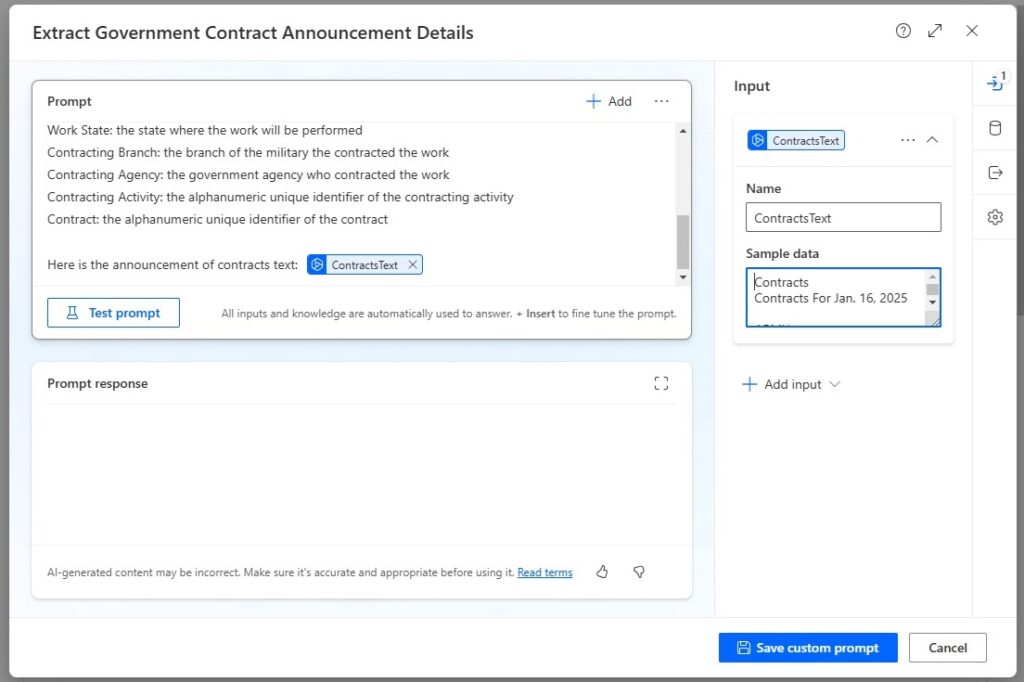
We want to extract the details of all contracts from the contract text. To do this we can build an AI Prompt. Go to the AI Prompts menu and choose build your own prompt.


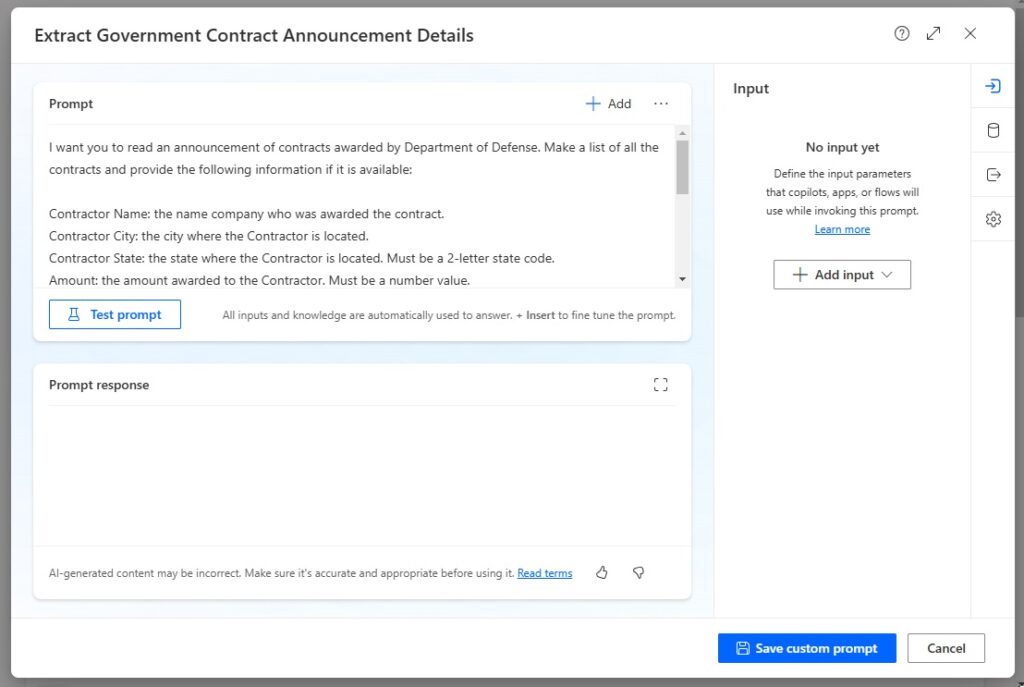
Name the AI Prompt Extract Government Contract Announcement Details.


Use this prompt to instruct the large-language model what details should be output.

I want you to read an announcement of contracts awarded by Department of Defense. Make a list of all the contracts and provide the following information if it is available:

Contractor Name: the name company who was awarded the contract.
Contractor City: the city where the Contractor is located.
Contractor State: the state where the Contractor is located. Must be a 2-letter state code.
Amount: the amount awarded to the Contractor. Must be a number value.
Completion Date: when the work is expected to be completed. Date must be in the format YYYY-MM-DD
Work Description: the goods or services being provided by the Contractor
Work City: the city where the work will be performed
Work State: the state where the work will be performed
Contracting Branch: the branch of the military the contracted the work
Contracting Agency: the government agency who contracted the work
Contracting Activity: the alphanumeric unique identifier of the contracting activity
Contract: the alphanumeric unique identifier of the contract

Here is the announcement of contracts text:


Input The Web Page Text As A Variable In An AI Prompt

The web page text must be included in the prompt for the AI to evaluate it. To do this, create a new input variable named ContractsText and insert it at the end of the prompt. Use the web page plain text as sample data.


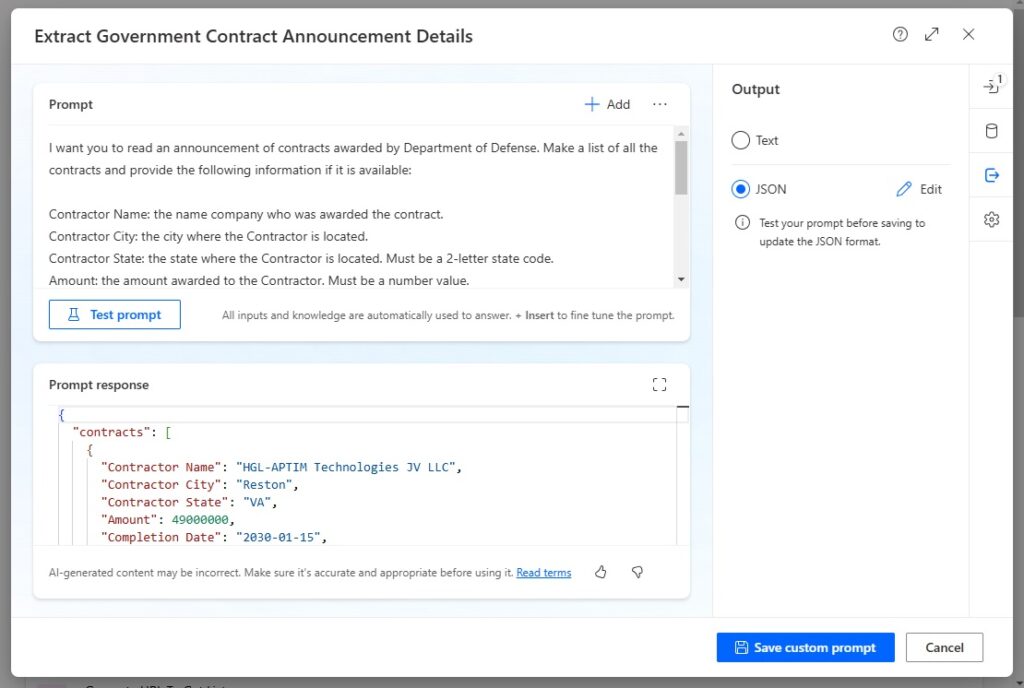
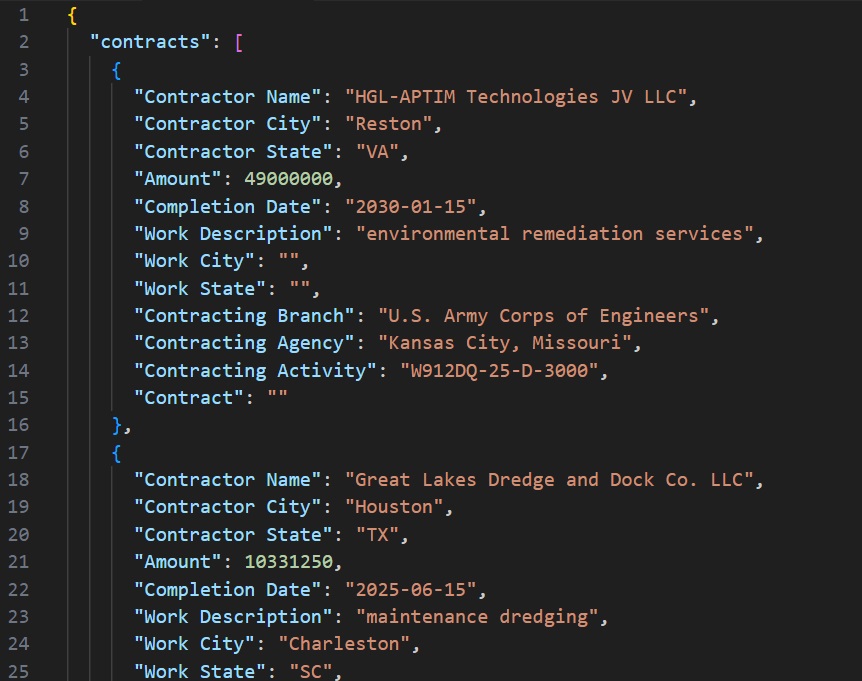
Choose the output format JSON and then test the prompt. We can now see the contract details output in the prompt response. Press the save custom prompt button and exit the prompt editor menu.


Run The Power Automate Flow To Extract Web Page Data

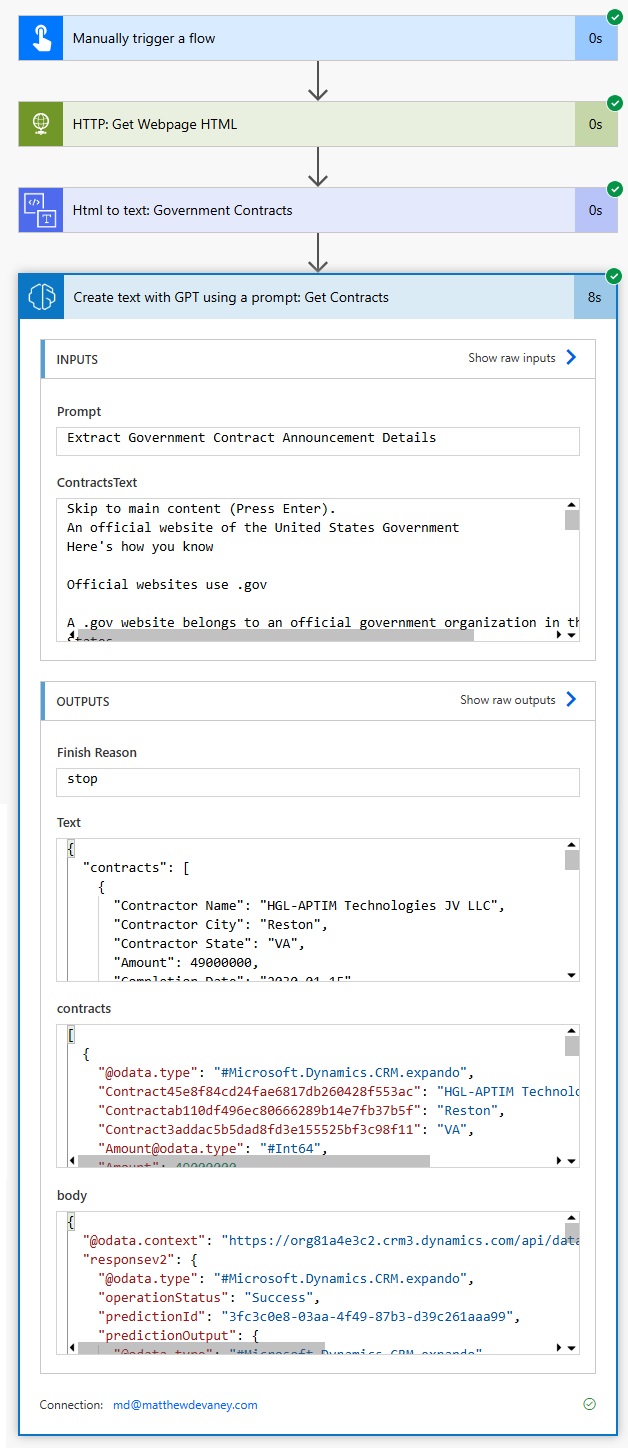
We are now done building the flow to extract contract details from the web page. Run the flow to ensure it works.


A JSON array of contracts is output by the AI Prompt and each item can be saved to SharePoint as a new list item or to Dataverse as a new record, etc.


No lock and distinct conditions in query expression

  Hi Folks, Whenever i tried using query expression for retrieve multiple operations, came to know some interesting facts which exists and h...