Friday, 22 August 2025

PCF Framework - Quick Guide


Let us see it in action using a sample project.

Launching the test harness, we can see the init executed followed by updateView.

Making any change in the component’s form factor, width, height, or Data Inputs property triggers the updateView method.

Now let us update the index.ts and add a textElement along with an event listener for its change event.

Inside the test harness, when we change the Value of the sampleProperty, if we want the value of the textElement to be updated, we need to use the updateView method to fetch the changed value from the bound sample property field and reflect this new data in the UI.

We can get the value of the sampleProperty from the context and use it to set the textElement value as shown below.

Now let us do the opposite, let us change the value inside the textElement. Here as expected none of the methods triggers.

Here we need to call the notifyOutputChanged method, to notify the host that the component’s output has changed.

On calling notifyOutputChanged, the framework runtime will first call getOutputs to get the value of the bound properties of the component, and then notifies the host.

The host will perform the validation and if the output received is valid it will call the updateView.

But before we do that let us first try setting the value of the sampleProperty in the change event handler of the textElement. Here on changing the value inside the text box, we can see only the change event handler is triggered. No other methods are triggered here as expected.

There is no update in the value of the bound sampleProperty.

This is because we need to call the notifyOutputChanged method to let the host know about the changes made in the value inside the text box.

On calling the notifyOutputChanged and changing the text value this time, we can see the getOutputs being called.

The value remains the same for the bound property and updateView method is not called as our getOutputs method was not returning anything.

Let us update the getOutputs method to return the sampleProperty having the text value.

On changing the textElement value this time getOutputs is called, followed by updateView.

To summarize,

  • To notify the host, about the user changes in the UI                                                ècall notifyOutputChanged
    è the framework will call the getOutputs
    è followed by èupdateView
  • Host changes the data/properties                                                               èupdateView will be called è context passed è we can update the UI as per our requirements


Saturday, 9 August 2025

Track Issues in Logic Apps/Flow using Correlation Id

 Previously I have written some blog post, like this one, showing how easy it is to create API endpoints in Flow and Logic Apps. This involves creating a workflow that gets triggered by an Http Request with a Json payload.  There are asynchronous “fire and forget” API calls and the calling process receives a 202 response code to indicate the workflow has been triggered. When the workflow runs it may call a number of actions across different connectors. Because it is asynchronous the calling process has no idea if the workflow has run successfully or if any actions have failed.

Track Issues in Logic Apps/Flow using Correlation Id Joe Gill Dynamics 365 Consultant

In this scenario tracking down issues and linking them to a specific API request can be difficult especially in a high throughput environment. There is a software pattern called the Correlation Identifier Pattern we can adopt to make these scenarios more supportable. The Correlation Identifier Pattern advises generating a unique identifier called a Correlation Id for each request. The Correlation Id then gets passed to each of the request’s action. That way any action’s success or failure can be traced back to the specific calling request.

We can adopt this pattern easily in Logic Apps and Flow as each workflow run generates a unique Run Id. The Run Id is also known as the Identifier or Correlation Id depending on which portal page you are on.  The calling process can acquire the Run Id from the response header tagged x-ms-workflow-run-id and log it as required with their request. 

Track Issues in Logic Apps/Flow using Correlation Id Joe Gill Dynamics 365 Consultant

When you view the run history for a Logic App workflow you can see the all the runs with their identifiers. The Run Id also get passed to any child workflows so you trace it across these as well.

Track Issues in Logic Apps/Flow using Correlation Id Joe Gill Dynamics 365 Consultant

You can access the Run Id from your workflow and use it in your actions.  In the workflow designer you can use the expression workflow().run.name to the get the Run Id. In my example I added a custom field to the CDS contact entity called Correlation Id, which I populate with the Run Id.

Track Issues in Logic Apps/Flow using Correlation Id Joe Gill Dynamics 365 Consultant

I also added the field to contact form’s footer.

Track Issues in Logic Apps/Flow using Correlation Id Joe Gill Dynamics 365 Consultant

Just one thing to note that is you can use this technique in Flow however the Runs Id are not displayed on the Runs details screen so you need to log the Run Id elsewhere as part of the workflow.

Track Issues in Logic Apps/Flow using Correlation Id Joe Gill Dynamics 365 Consultant

Now when you partner calls support enquiring about an API call problem they can use the Run Id to track exactly what happened.

Wednesday, 6 August 2025

Force Rollup Column Calculation in Power Automate

 Rollup columns have been around since the dawn of time CRM. They are a great way to aggregate data across a hierarchy of data such as totals, averages, maximum and minimum, but they come with some limitations too. The shortest delay between each rollup calculation in the system is one hour, which is defined on a per column basis. In many cases this is sufficient, but sometimes you may want to force this recalculation after a change has been made which affect the roll up total.

Recalculating the column for all the rows in the table can have performance implications for large data sets and is often unnecessary. Instead we can recalculate a specific rollup column for a specific row automatically in Power Automate. How you trigger this depends on the scenario but all scenarios will be triggered by a record change in Dataverse of course.

  • When an Opportunity is won - recalculate Account ‘Actual Revenue’

  • When a Contact is Associated to an Account - recalculate Account ‘Number of Contacts’

  • When an appointment is marked complete, regarding an Opportunity - update Opportunity ‘Last Appointment Date’

Compose the request URL

We need to build the GET request URL which looks like this, replacing everything *Inside these*:

https://*environment_url*/api/data/v9.1/CalculateRollupField(Target=@tid,FieldName=@field)?@tid={'@odata.id':'*entity_set_name*(*row_uniqueidentifier *)'}&@field='*logical_column_name*'

Environment URL

Odata from ‘Get a row’ or ‘Add a new row’

uriHost(outputs('Action_Name')?['body/@odata.id'])

Odata from ‘List rows’

urihost(body('List_Rows_Action_Name')?['@odata.context'])

OData from ‘When a row is added, modified or deleted’

Not available, use a get row action after the trigger instead, ensuring you use ‘Select columns’ and enter the Uniqueidentifier column name (e.g. contactid or aeh_tableid), the @odata.id will always be returned in a get/list rows action even when not selected.

Entity Set Name

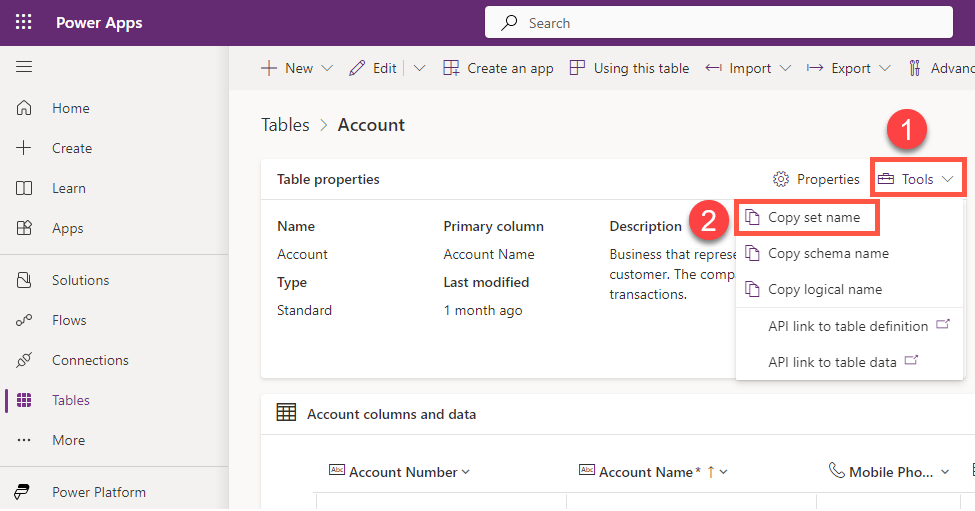
The plural name of the table, usually an ‘s’ or ‘ies’ on the end of the logical name e.g. ‘contacts’ or ‘accounts’

Row Uniqueidentifier

This will be an input based on wherever your flow is triggered from e.g. d1a757d9-f993-4617-b968-ec5d7e3fe98c

Logical Column Name

The name of the column that includes a prefix and all lowercase

GET request ‘CalculateRollupField’

To trigger the rollup calulation we need to use a HTTP Request. Make sure you choose the ‘Invoke an HTTP request’ for ‘HTTP with Microsoft Entra ID (preauthorized)’. To create the connection you just need to enter your dynamics 365 url in both the Base resource URL and the Resource URI e.g. ‘https://ameyholden.crm.dynamics.com/’

Set the Method as GET and use the outputs from your compose step above as the ‘Url of the request’.

The end - happy rollup-ing!

PCF Framework - Quick Guide

  Let us see it in action using a sample project. Launching the test harness, we can see the  init  executed followed by  updateView . Makin...