DESCRIPTION
The provision for creating and sending Dynamics 365 CE (CRM) Emails from a Power-Automate (MS Flow) has always been appreciated due to its simplicity. But setting the Email Sender (From) and Recipients (To/CC/BCC) dynamically is always tricky. In this blog, we will learn how a CE Developer can set these Parties for an Email dynamically in a Power-Automate using OData Binding.
Please note that we have 11 different types of Activity Parties in Dynamics 365 for Customer Engagement and Microsoft crm development. An Activity Party Type is stored as an integer value in the attribute - ActivityParty.ParticipationTypeMask. For an Email Activity, we have the following Activity Party Types:
| Activity Party Type | Activity attribute | Integer Value | Description |
|---|---|---|---|
| Sender | Email.From | 1 | Specifies the sender. |
| ToRecipient | Email.To | 2 | Specifies the recipient in the To field. |
| CCRecipient | Email.Cc | 3 | Specifies the recipient in the Cc field. |
| BccRecipient | Email.Bcc | 4 | Specifies the recipient in the Bcc field. |
Then the ultimate solution is to pass on your query to us. We are at your service and will provide the best services.
For this blog, we will consider a simple requirement to develop a Power Automate – Once an account name is updated, an email must be triggered by the user who has modified the account to the Primary Contact, keeping the Account Owner (user) in CC.
STEPS
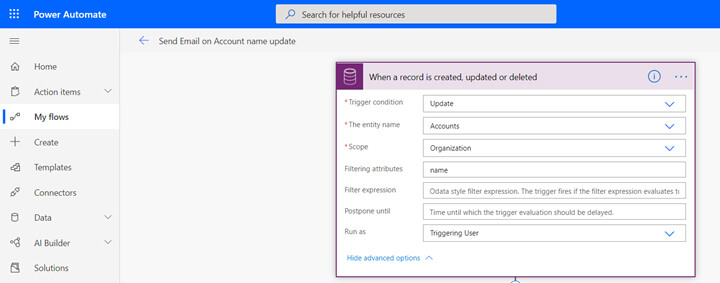
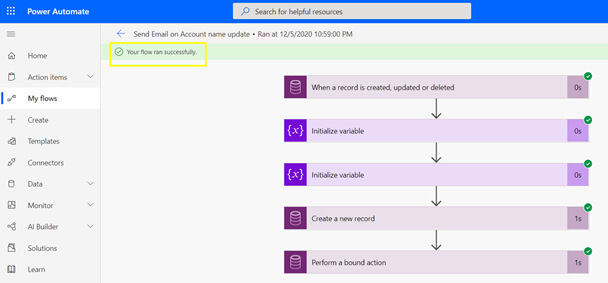
We begin with creating a new Power-Automate (Flow) - Send Email on Account name update. It triggers on Update of an Account Name.
We next initialize an Array Variable – Email_Recipients. We bind the “From” to the user who has updated the account name, “To” to the account primary contact and we “CC” the account owner. Please note that the property “participationtypemask” is 1 for “From”, 2 for “To” and 3 for “CC”.
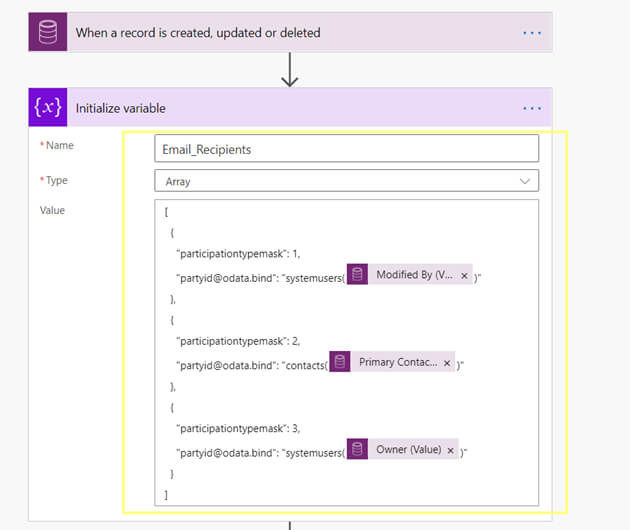
You can copy the value from below.
[
{
"participationtypemask": 1,
"partyid@odata.bind": "systemusers(@{triggerOutputs()?['body/_modifiedby_value']})"
},
{
"participationtypemask": 2,
"partyid@odata.bind": "contacts(@{triggerOutputs()?['body/_primarycontactid_value']})"
},
{
"participationtypemask": 3,
"partyid@odata.bind": "systemusers(@{triggerOutputs()?['body/_ownerid_value']})"
}
]
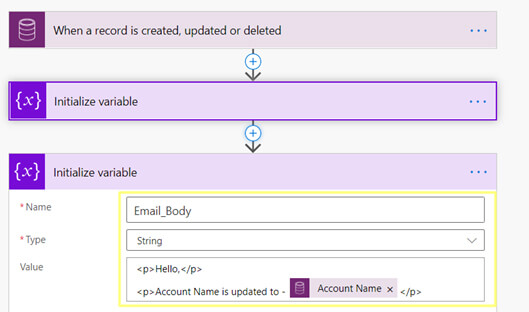
Then, we add another variable – Email_Body and initialize it with the string - “Hello, Account name is updated to <new account name>”.
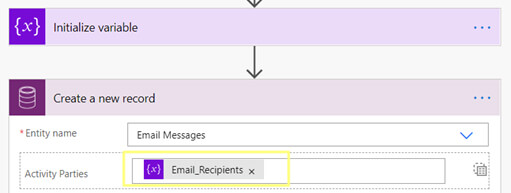
Next, we create a new CDS record – Email Messages. Make sure to switch to input entire array for Activity Party Attributes.
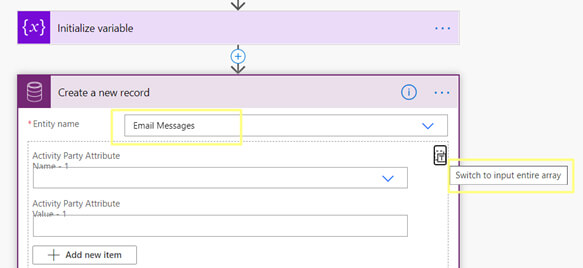
We assign our array variable – Email_Recipients to Activity Parties.
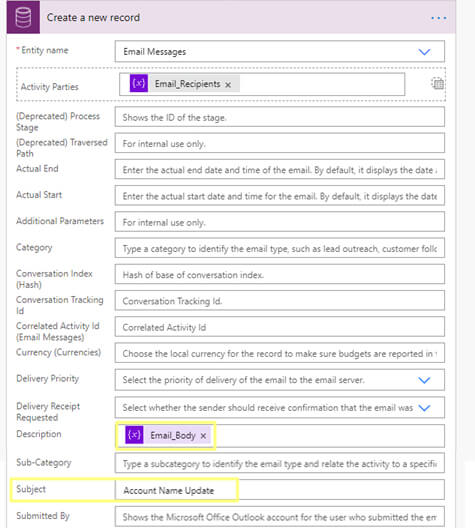
We assign the string variable Email_Body to the Description attribute. We set the Email Subject – “Account Name Update.”
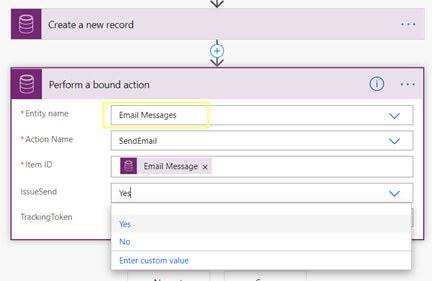
Finally, we add a new CDS action – Perform Bound Action to send the Email message. Save these changes.
UNIT-TESTING
We update an account name and check if our Power-Automate Send Email on Account name update has been executed successfully.
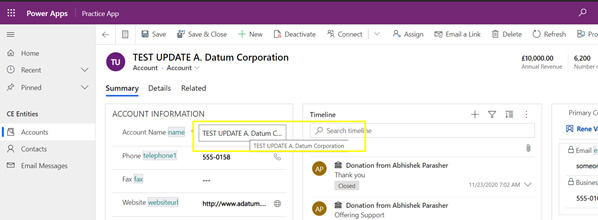
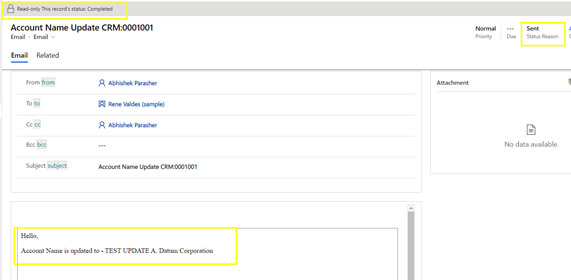
We verify that the CE Email record is created and sent successfully as expected.
CONCLUSION
Hence, we comprehensively learned in this blog how a CE Developer can set the Activity Parties for an Email (From/To/CC/BCC) dynamically in a Power-Automate using OData Binding.
That’s all from this blog, see you in my next one.


No comments:
Post a Comment