Wednesday, 28 April 2021

Step by Step – Create a very simple PowerApps Custom Component to show the GUID of the record

 Below is the quick step by step guide to get started (sort of Hello World example) 

  • Install NPM (that comes with Node.js)

https://nodejs.org/en/

http://download.microsoft.com/download/D/B/E/DBE69906-B4DA-471C-8960-092AB955C681/powerapps-cli-0.1.51.msi

  • Install Visual Studio 2017 or later or Download .NET Core 2.2 along with Visual Studio Code.
  • Create the new folder for the project, and in Developer Command Prompt for VS 2017 navigate to the folder and run the below command to create a new component project

pac pcf init

– -namespace <namespace for the component>

– -name <name of the component>

– -template <component type>


It adds the following files in the folder.


  • Next run npm install command to install the project dependencies.

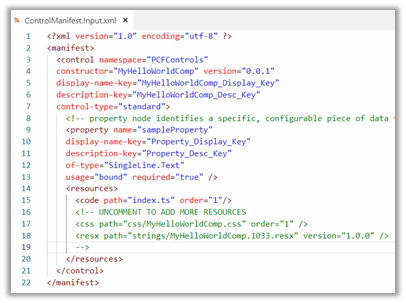
  • Open the ControlManifest.Input.xml file created inside the folder created with the control’s name.

  • Here we have opened it in Visual Studio Code, for this simple example purpose let us not change the default values.
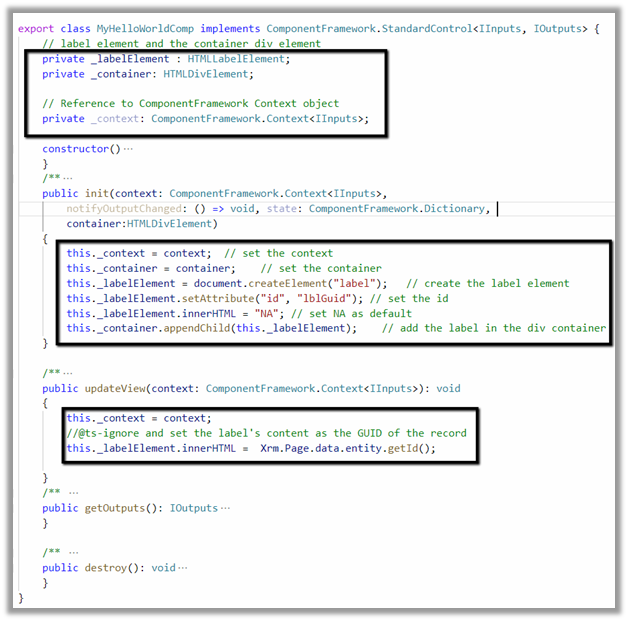
  • Open the index.ts which wherein we’d be writing code for our custom control

  • Add the following line of code to add a label control that will display that GUID of the record.
  • Run npm run build command to build the control

  • To test the control run npm start command

*Use ctrl + c è to terminate the job.

  • Create a new folder to hold the solution
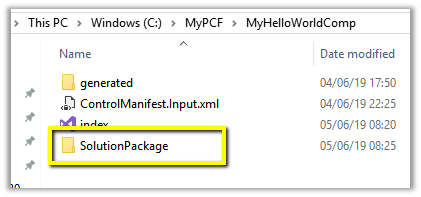
  • Run the below command to define the publisher name and prefix and initialize the solution files creation

pac solution init – -publisherName [publisher name] – -customizationPrefix [publisher prefix]

  • Run the below command to add reference to our custom control in the solution

pac solution add-reference – -path [path to pcfproj file]

i.e. reference of the below path.

  • This creates the file with extension cdsproj

  • To generate Zip File run the below command in the Developer Command Prompt for Visual Studio 2017
    • MSBUILD /t:restore
    • MSBUILD

  • This adds the Solution zip in the bin Debug folder.

  • To get both managed and unmanaged solution, update the cdsproj file
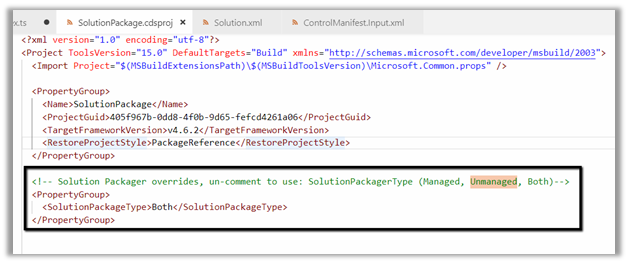
  • We can see both managed and unmanaged solution created.
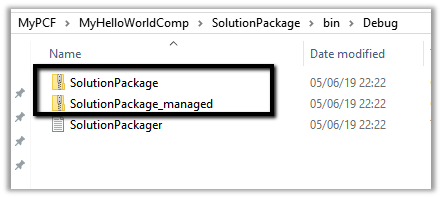
  • Import the solution in Dynamics 365 CE and open any of the entity’s form. Here we have created a new text field named GUID in the Contact form and have set our custom control for that field.

For reference à
  • After publishing the changes, we can see the GUID being displayed in the form.

  • To update the control, change the version for it in the ControlManifest.Input.xml

Followed by

  • npm run build
  • msbuild
  • Importing the new solution file generated

In a nutshell below are the high-level steps à

1. Install npm

2. Install PowerApps CLI

3. Install Visual Studio 2017 or later

4. Create a new folder for the project.

5. Navigate to the folder in Developer Command Prompt and run the following command to create the component project

PAC PCF INIT –NAMESPACE <COMPONENT NAMESPACE> –NAME <COMPONENT NAME> –TEMPLATE <COMPONENT TYPE>

6. Install the project dependencies using below command

NPM -INSTALL

7. Update ControlManifest.Input.xml

8. Update index.ts

9. Build the project

NPM RUN BUILD

10. Use the below command to test the component

NPM START

11. Create a folder for holding the solution zip and related files. Navigate to that folder and run the below command.

PAC SOLUTION INIT – -PUBLISHERNAME [PUBLISHER NAME] – -CUSTOMIZATIONPREFIX [PUBLISHER PREFIX]

12. Add reference of the custom component in the solution

PAC SOLUTION ADD-REFERENCE – -PATH [PATH TO PCFPROJ FILE]

3

13. To create the Solution Zip File

MSBUILD /T:RESTORE

MSBUILD

4

14. Import the solution file and use it inside Dynamics 365 CE.

Thursday, 15 April 2021

Resolve the error in the “Automatic Record Creation Rules” of the Queue entity, when the sender of the email is a Contact as well as a User in the Microsoft Dynamics 365.

 Many a times in the Microsoft Dynamics 365, the Automatic Record Creation Rules, which we create on the queue entity fail for incoming email activities if the sender’s email address exists as a Contact as well as a User record. I had faced the same issue when I was trying to set the sender of an email activity, which was a Contact and a User in the CRM.

This error can be seen in the System jobs. And, the error specified there for the failed Rule Item was: “You should specify a parent Contact or Account.”

Now, to solve this error, we need to follow below steps:-

1. Go to Settings -> Service Management -> Automatic Record Creation and Update Rules

2. Select the Rule and deactivate it.

3. After deactivation, open the Automatic Record Creation Rule -> Open Rule Item

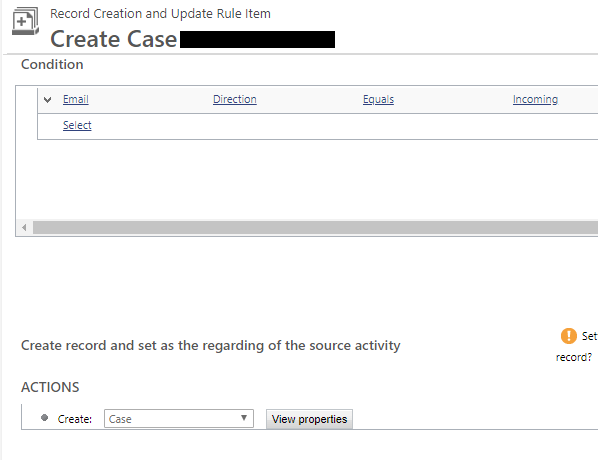
4. Under Actions -> Select the existing Create Case (here this could be any CRM entity) action and delete it -> Save the form.

5. Re-create the Create: Case action under “ACTIONS” and then enable the Automatic Record Creation Rule.

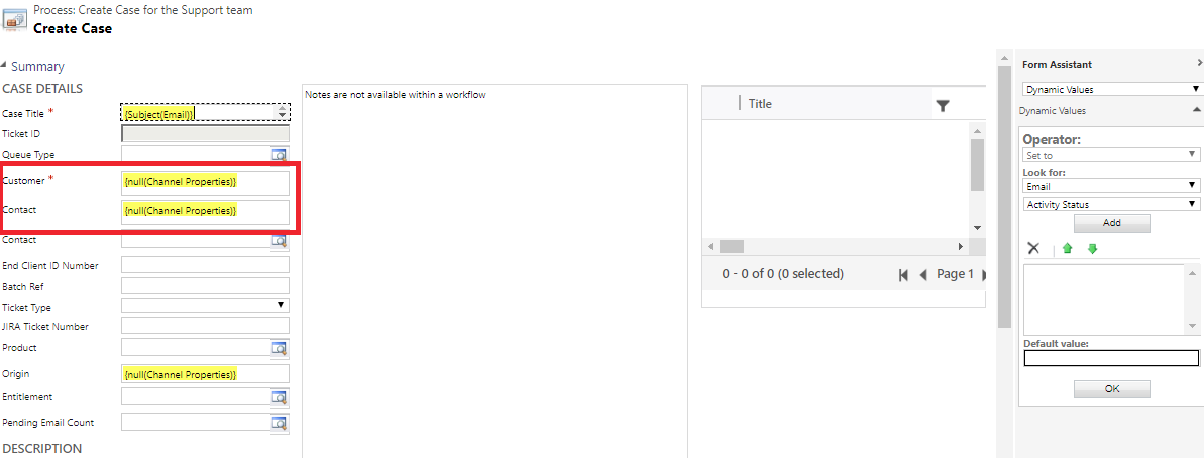
Note:- In the below screen print you can see that the default value: {null(Channel Properties)} is set in the OOB Customer and Contact fields. This must not be changed, otherwise, it cannot be reset manually and you will have to delete and recreate this Create: Case action again.

Please note, the aforesaid solution will only work when we’ve User and Contact records with the same email address. It will not work if the sender of the email exists only as a User in the CRM and not as a Contact or an Account.

Thus in such situation, enable the automatic creation of the sender of the Email as a Contact. With that you will be reaching to the point where the above solution could be implemented.
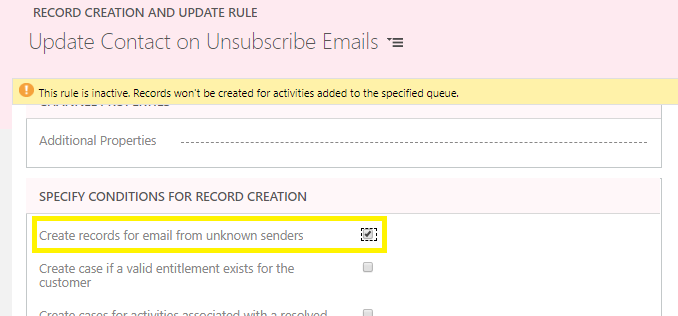
To enable it, you just need to select the ‘Create records for email from unknown senders’ checkbox in the Automatic Record Creation Rule.

I hope this helps you!!

Tuesday, 13 April 2021

Level up for Dynamics 365/Power Apps


Level up is a chrome Extension. 

Click on the Following link to download the latest version to your chrome browser. 

Download

Monday, 12 April 2021

Dynamics 365 Terminology Updates - Things a developer should know


Terminology updates

Responding to customer feedback and data from user research, effective November 2020 we're updating some terminology in Dataverse to be more intuitive and make its usage more productive. The terminology updates are listed below, and we're in the process of rolling them out across Microsoft Power Platform.

TERMINOLOGY UPDATES
Legacy termCurrent term
Entity, entitiesTable, tables
Field, fields
Attribute, attributes
Column, columns
Record, recordsRow, rows
Option set, multi select option sets
Picklist, picklists
Choice, choices
Two OptionsYes/No

Thursday, 8 April 2021

Making USD faster and better - Dynamics CRM


USD – Faster load times using the cache.


When the USD application loads various user and configuration settings need to be loaded from the server, this can take time. The load time of USD can be reduced by forcing a local cached of these settings.

The advantage being that the USD application will load faster, the disadvantage being that you’d need to remember to update your USD options to force a refresh of the local data following each change.

NOTEA word of caution, the cache contains USD settings but seems to also hold information from other entities such as the CRM system user. Any changes to a configuration option that directly or indirectly effects the USD operation could mean a refresh is needed.

The process of enabling the cache is a simple one, go to the USD settings and select options.

USD Screen

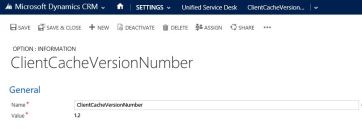
Now add a new user option called “ClientCacheVersionNumber

Cache

The value parameter is used to hold the current version number of your USD application. When a new version is available, increase this value to reflect the change. When USD loads the change in this value will be detected and the USD cached data will be refreshed.

USD Issues and resolution - MS dynamics CRM


HOW TO DELETE USD CACHE TO RECOVER FROM USD ERRORS


In Unified Service Desk, users may encounter errors when using USD, such as pages not loading, custom JavaScript not running etc. These errors may be a result of USD caching.

To delete the USD cache, first browse out to your appdata folder in Windows Explorer. You can access appdata by typing %appdata% in the Windows Explorer navigation bar, which will take you to the user’s AppData\Roaming folder.

Next, delete the following folders, which will be recreated when USD loads:

  • AppData\Roaming\Microsoft\USD
  • AppData\Local\Microsoft\UnifiedServiceDesk

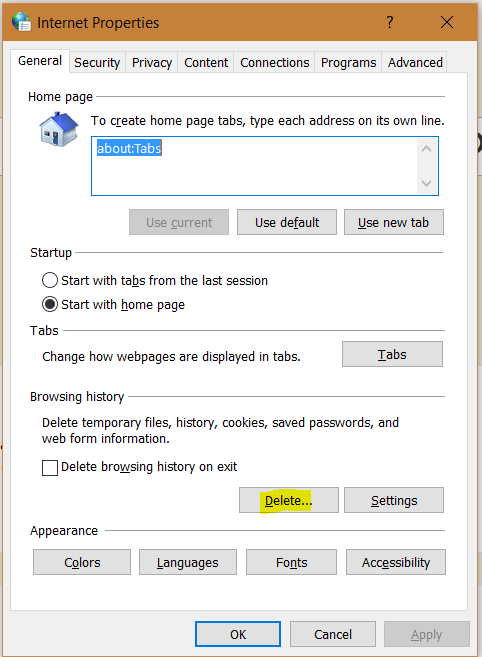
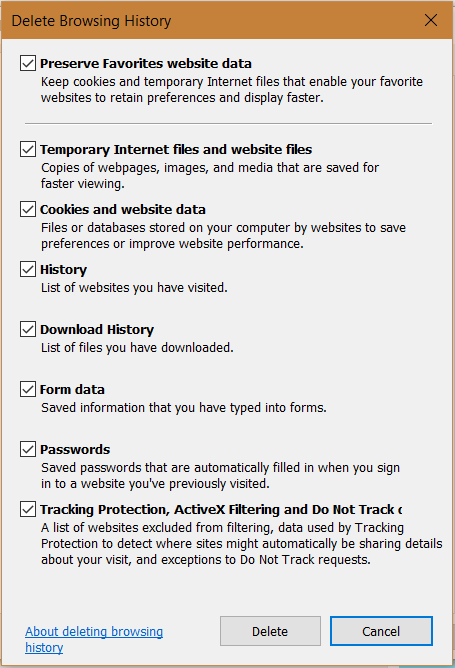
You may also need to delete your IE cache. To do this, from Windows Start go to Internet Options, or from IE, go to Tools->Internet options. Select Delete:

And then Delete:

Power Apps Drag & Drop Kanban code sample

  Introduction: The Kanban Board App Developers at a software company use the Kanban board to show their progress on development tasks and b...